Deep Learning Style Transfer – Tutorial
If you’ve ever wanted to be the next Andy Warhol, but just didn’t have the artistic talent, now AI can do it for you. Style transfer neural networks enable you to apply an artistic style to an image. They are created by taking an existing image classification network and using it as a loss function in training the transfer network, comparing transformation output to training images and an example style image, such as a painting. Intuitively, we are using a pre-trained network to train a new network to mix semantic features of a target image with textures from a style image.
We make use of JC Johnson’s fast-neural-style implementation of this process, using his pre-trained VGG16 network to calculate the loss during training. We use K80 GPUs on Rescale to efficiently train the transformation network and then apply the network to new images.
Style transfer happens in two steps: 1) training the style transfer network itself and 2) applying the transfer model to new images. Below, we show how to set up a Rescale job to perform each step.
Below are four of Rescale’s team members styled to various artworks, including Jackson Pollock, Takashi Murakami, and a photo of a skyscraper in Hong Kong. See if you can guess which is which. 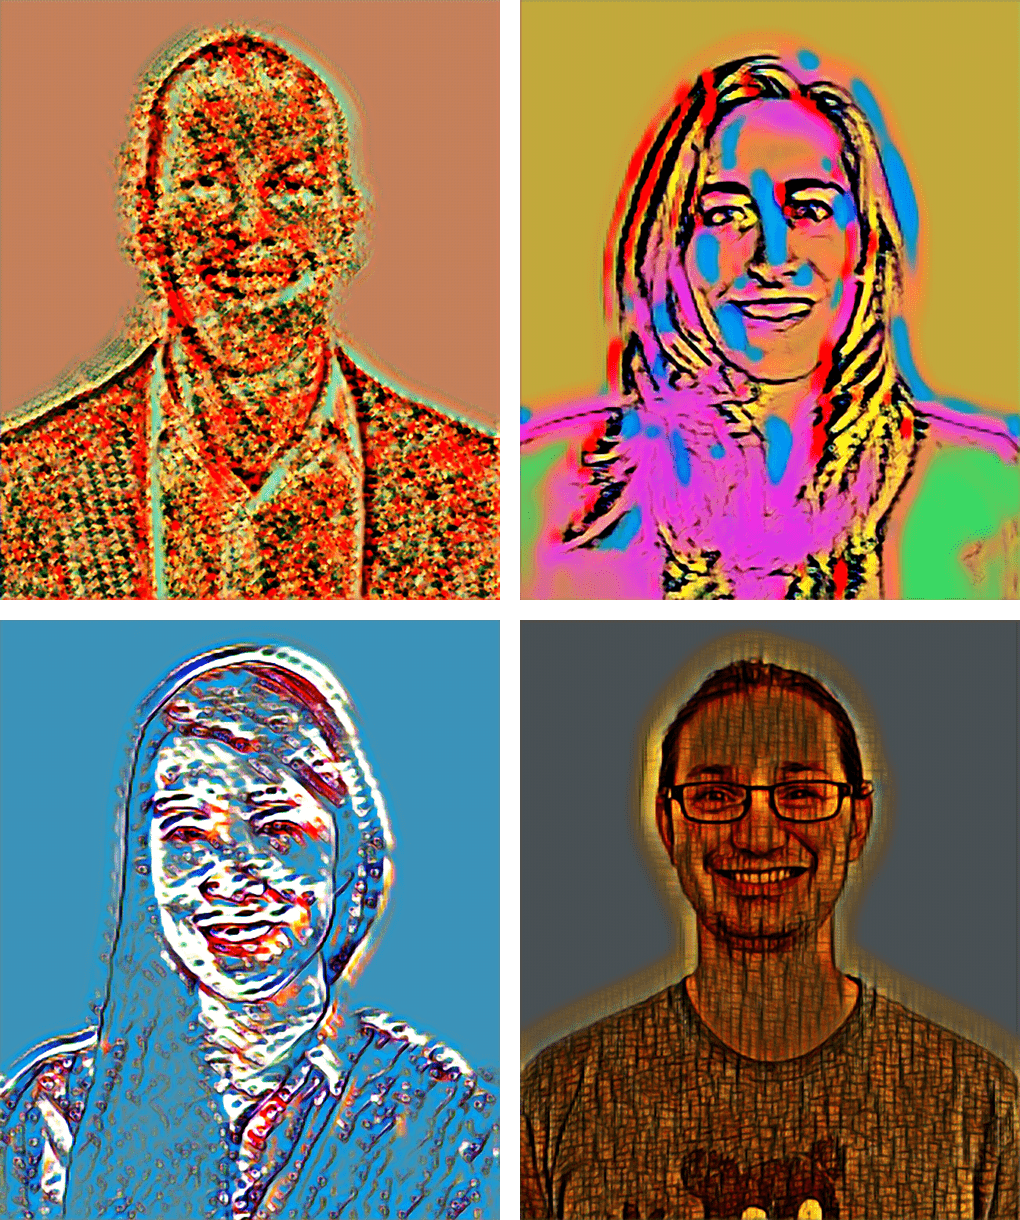
Style Transfer can be easily achieved on Rescale’s cloud computing platform with our new K80 GPU hardware. We’ve included a tutorial along with sample files for you to generate your own neural network artistically rendered images. In this tutorial, you will be able to style Jackson Pollock’s “On Arches” onto a portrait of Clint Eastwood, Darth Vader, David Bowie, and a corgi.
Performing Style Transfer on Rescale
We will now show you how to run your own style transfer job on Rescale. We will create a Torch network training job and run jcjohnson’s fast-neural-style package. This job can then be cloned to train new styles or style new images. You can clone this job on Rescale here.
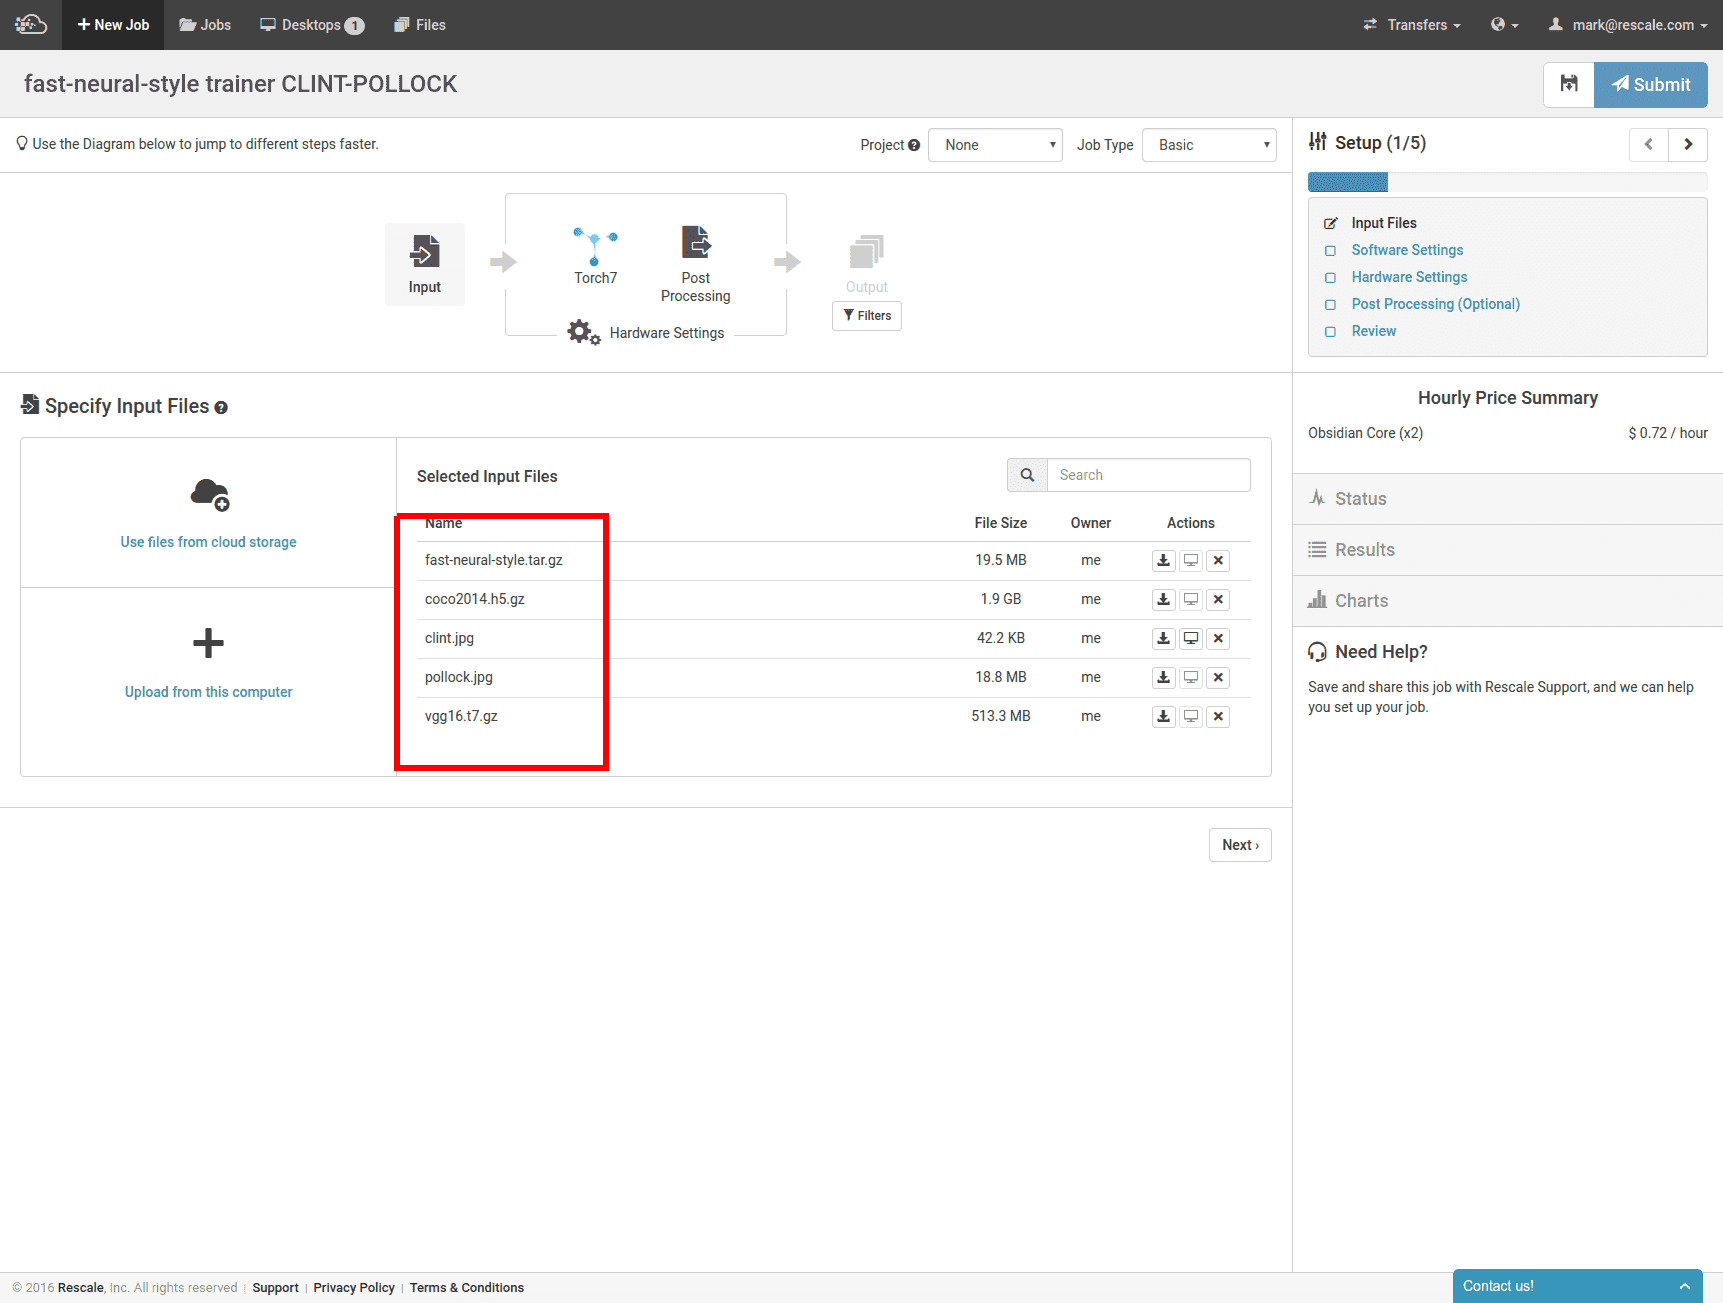
To start, we upload the following files as input:
- fast-neural-style.tar.gz: tarball with jcjohnson’s software downloaded from GitHub.
- coco2014.h5.gz: Microsoft COCO 2014 image-in-context training dataset in hdf5 format (this repository is actually a random selection of 1/10 of the original images in COCO 2014).
- clint.jpg: image we will style
- pollock.jpg: image (artwork) used to style image
- vgg16.t7.gz: trained VGG16 model in Torch’s t7 format
Next, we specify that we will be running Torch and which script to run. We first run train.lua. to build the style transfer model using VGG16 as the base model, COCO 2014 as the training dataset, and pollock.jpg as the style. Once the style transfer model, model.t7 is created, we call fast_neural_style.lua to style clint.jpg. After styling is complete, we clean up files we do not need to keep in Rescale storage.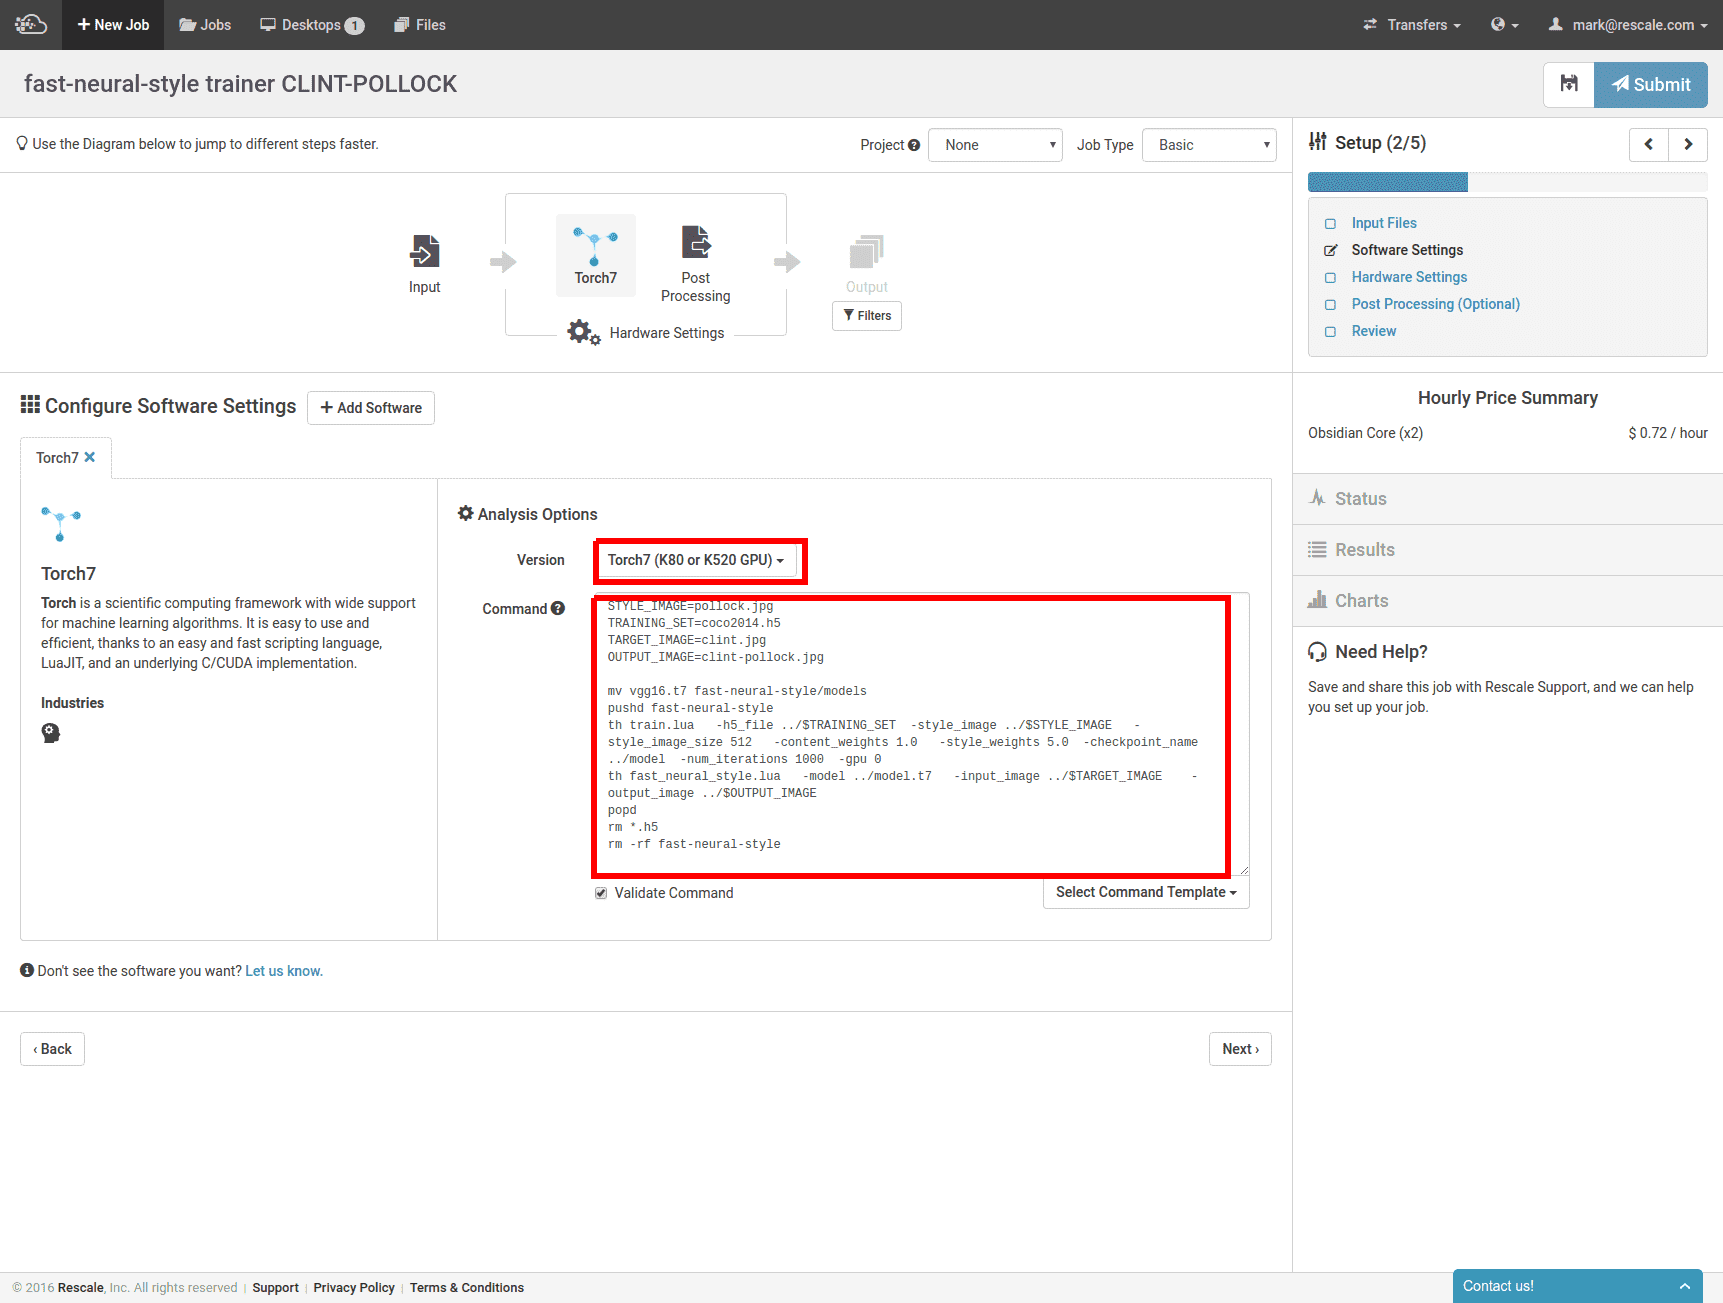
We are almost ready to run. Now, select the Obsidian core type, 2 CPU cores (which corresponds to 1 K80 GPU), then hit Submit.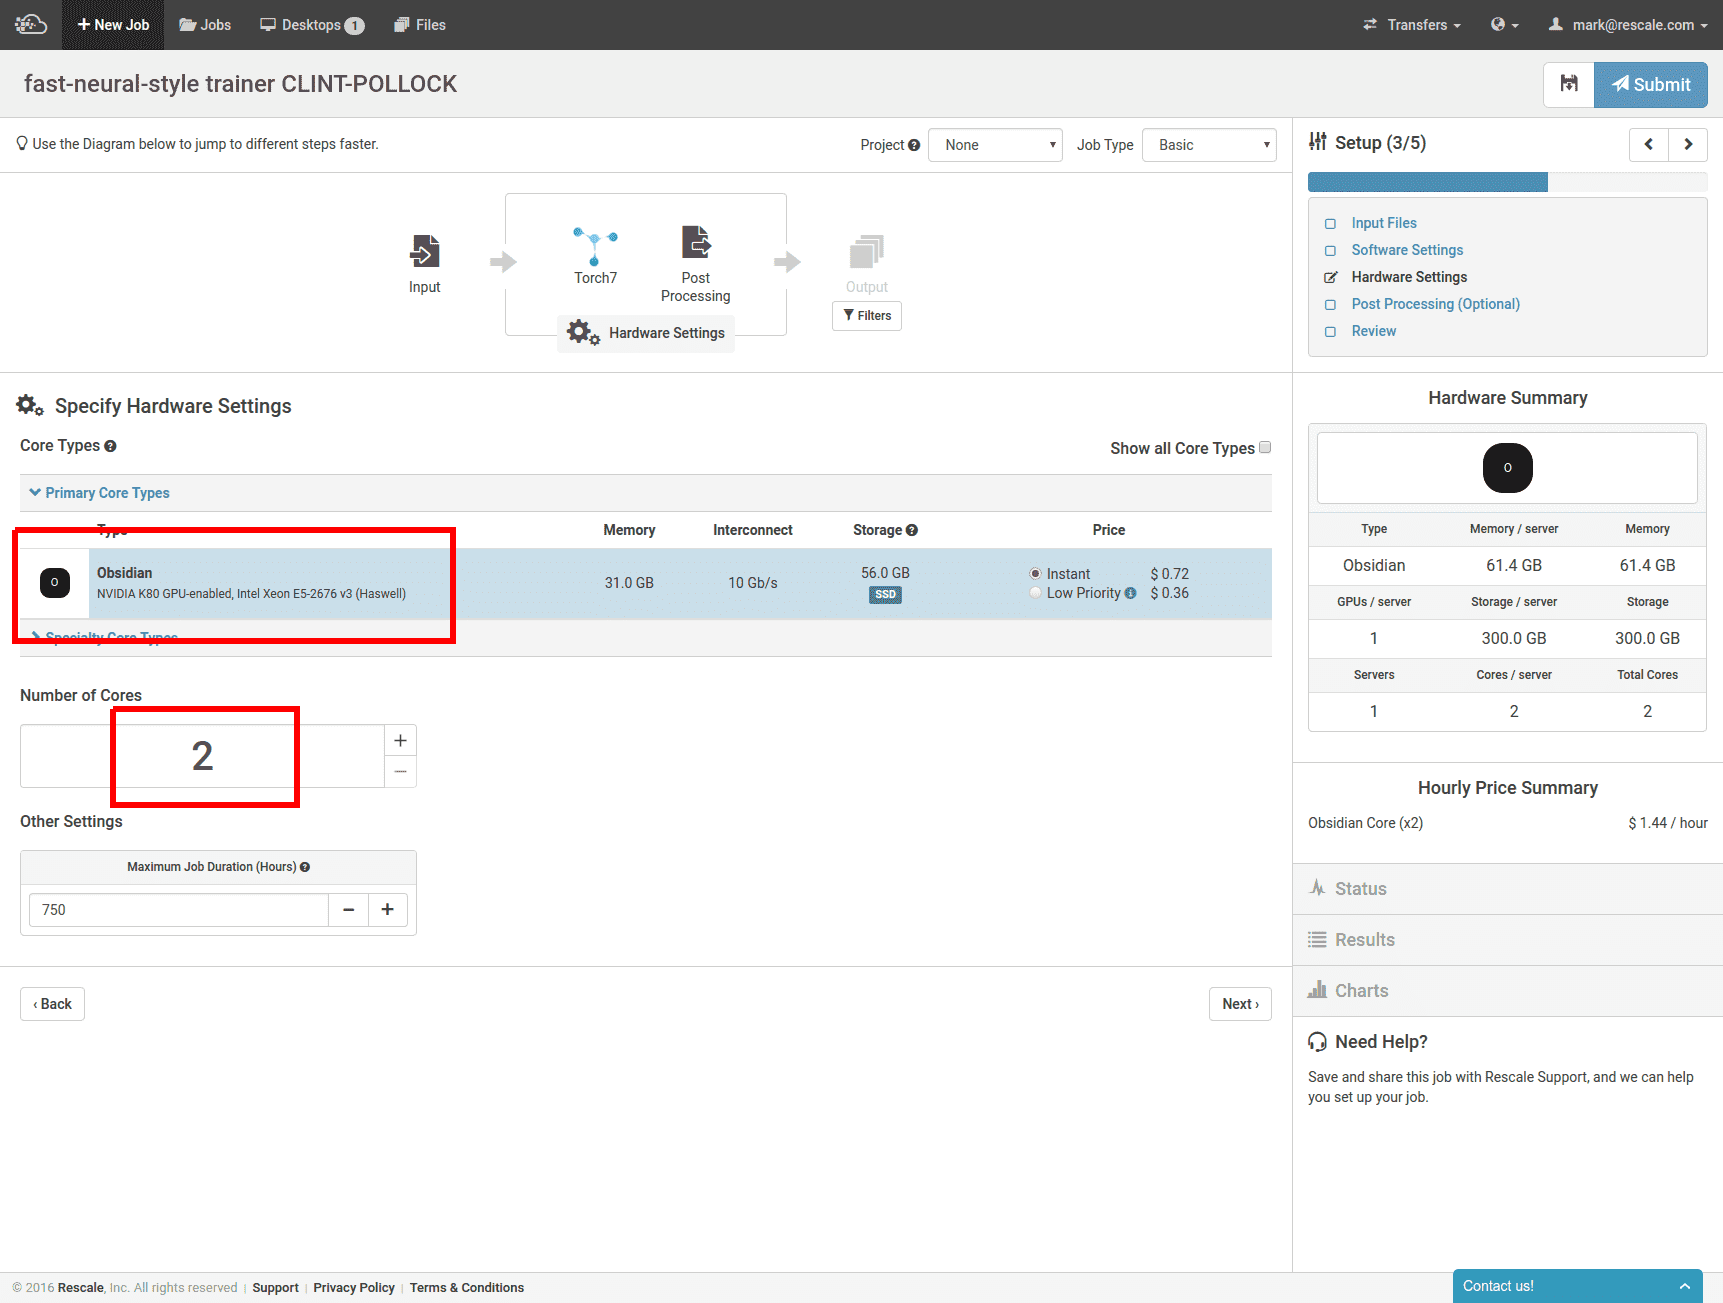
Once our cluster starts and our inputs are synced to the cluster, the initial style model training begins and we see a view like below: 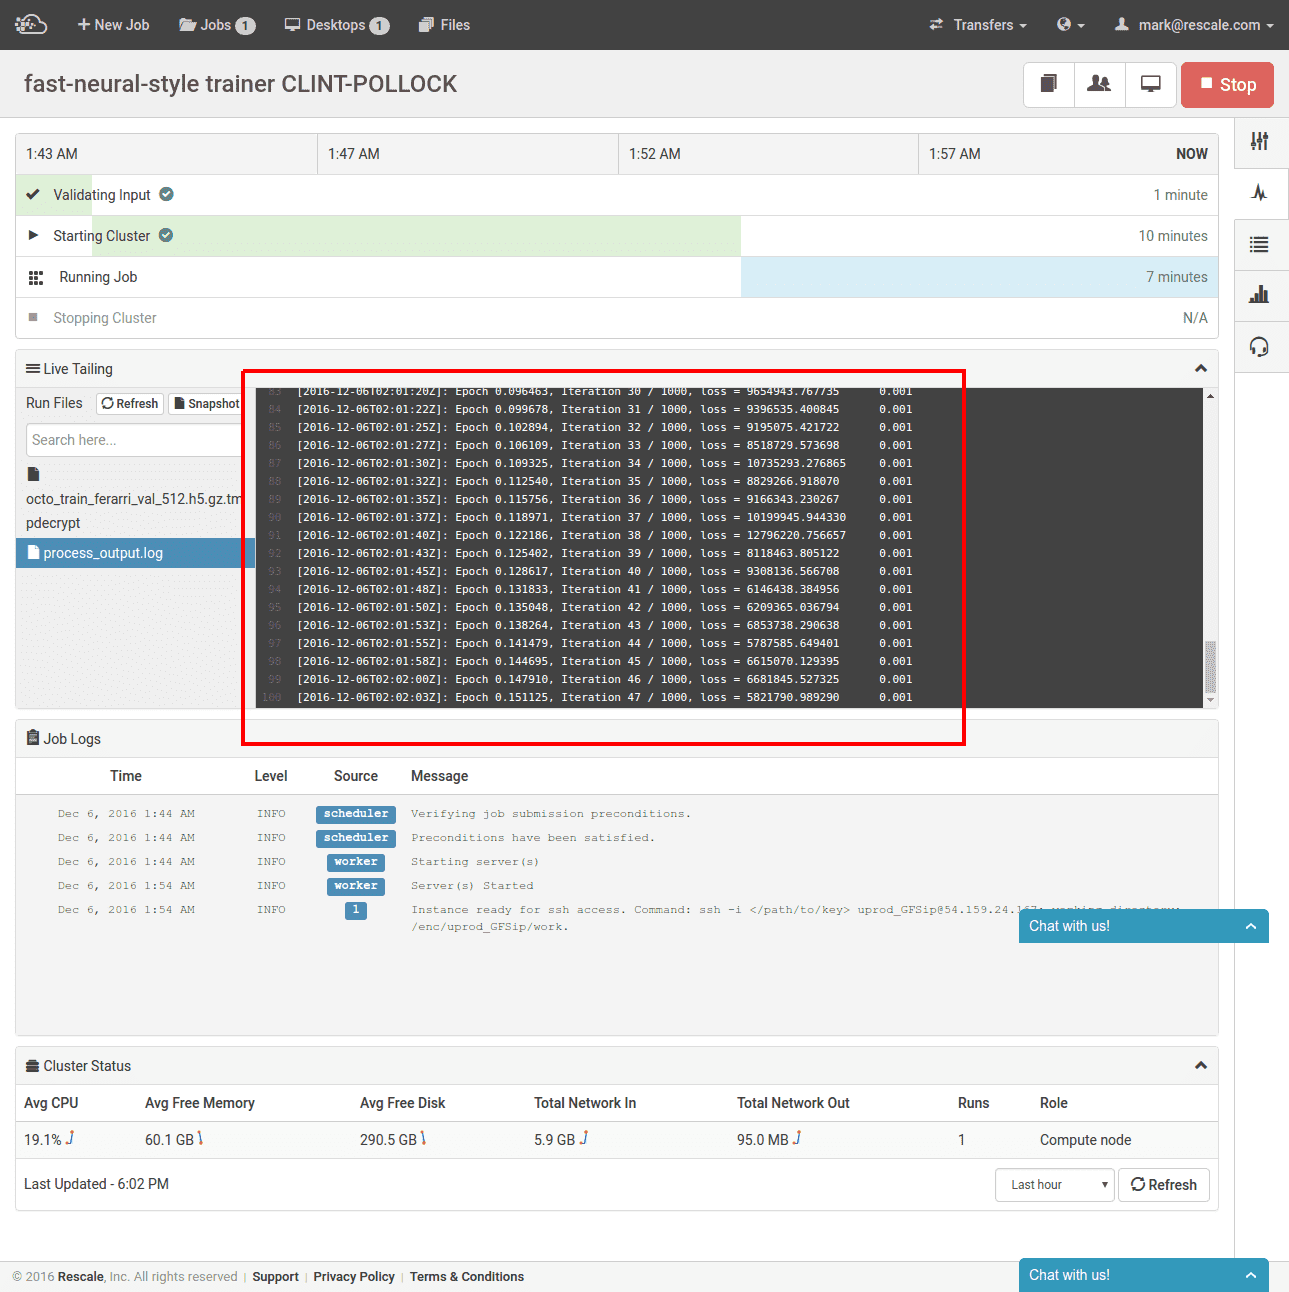
After training and image styling completes, the result files are synced back and we can view our styled Clint Eastwood: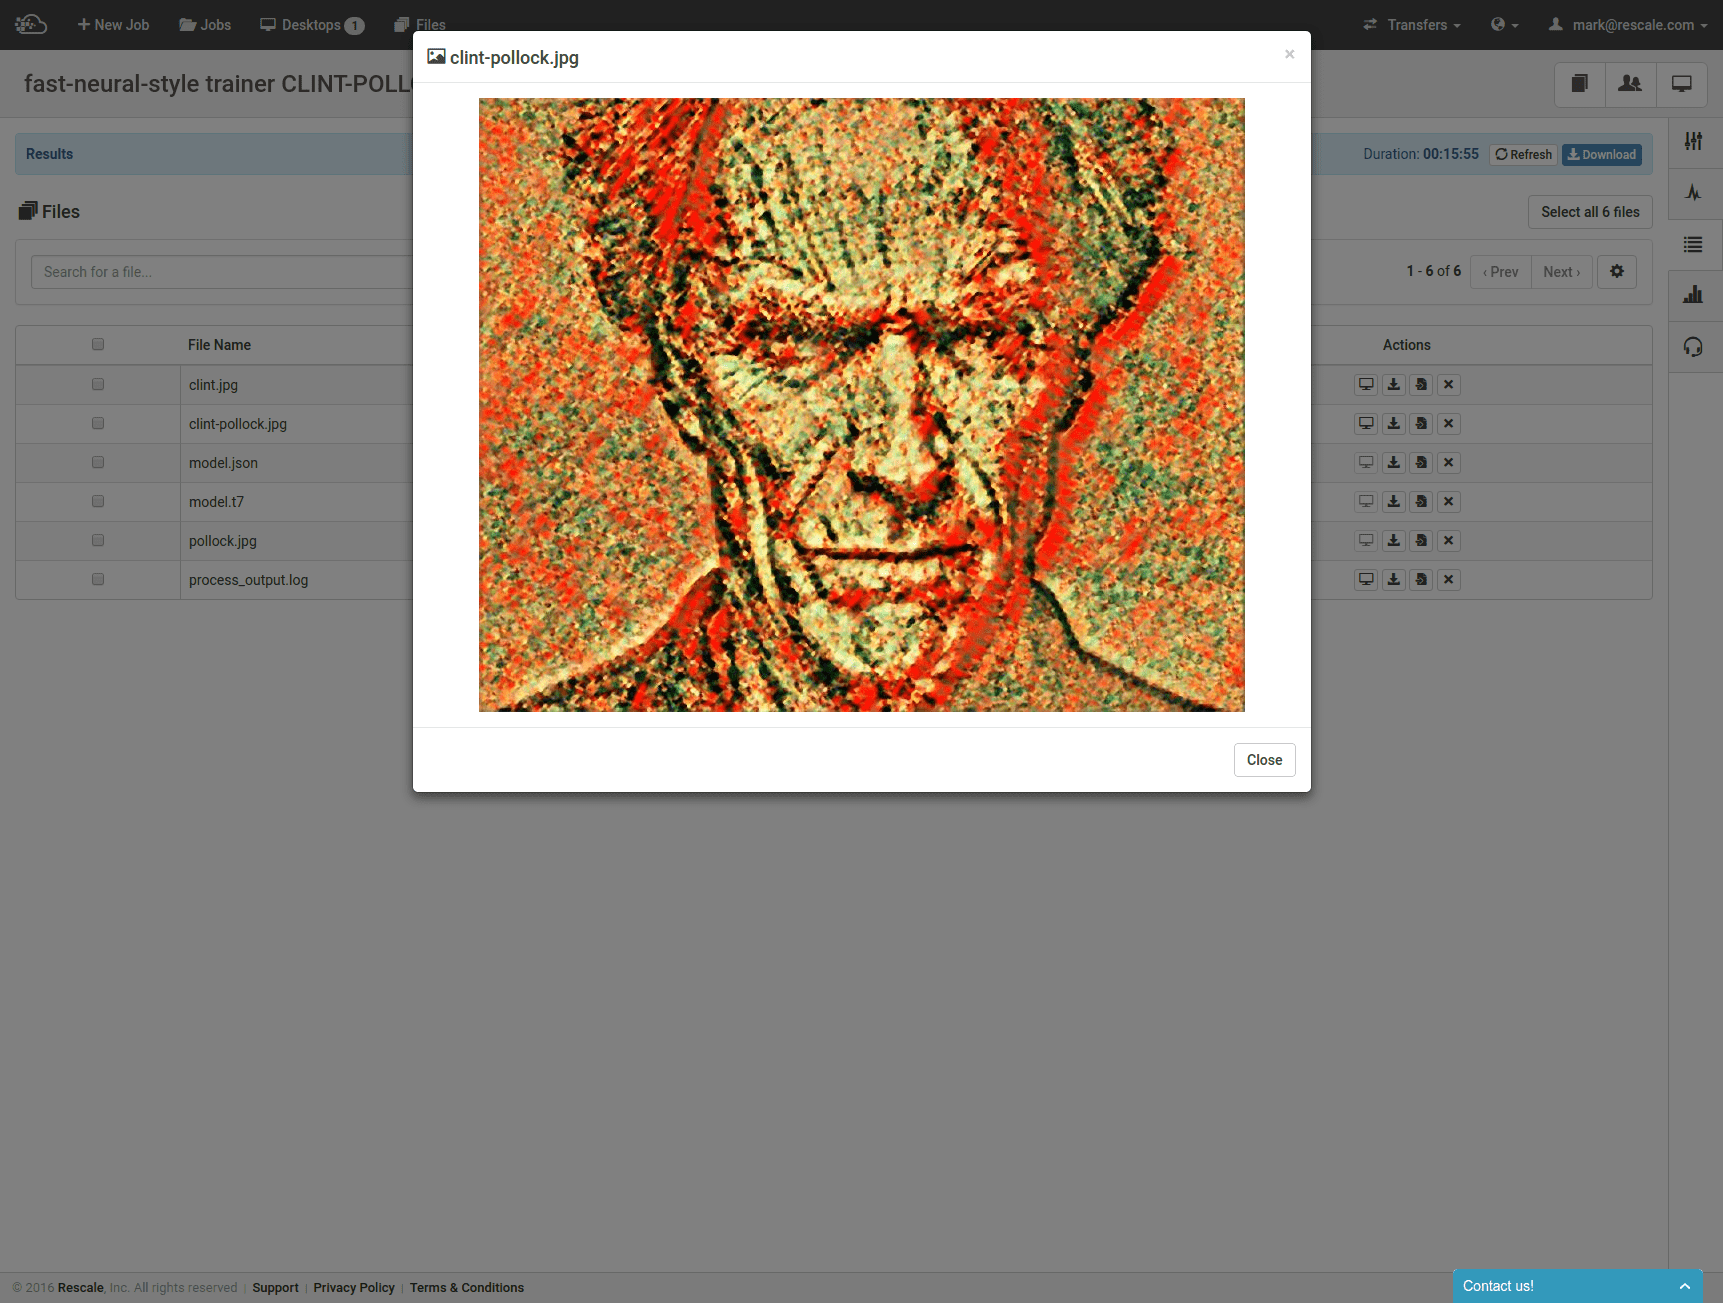
Notice that we also have model.t7 in our output files. This is the Pollock style transfer neural network which we use to style further images. Let’s first make this model file available as an input file: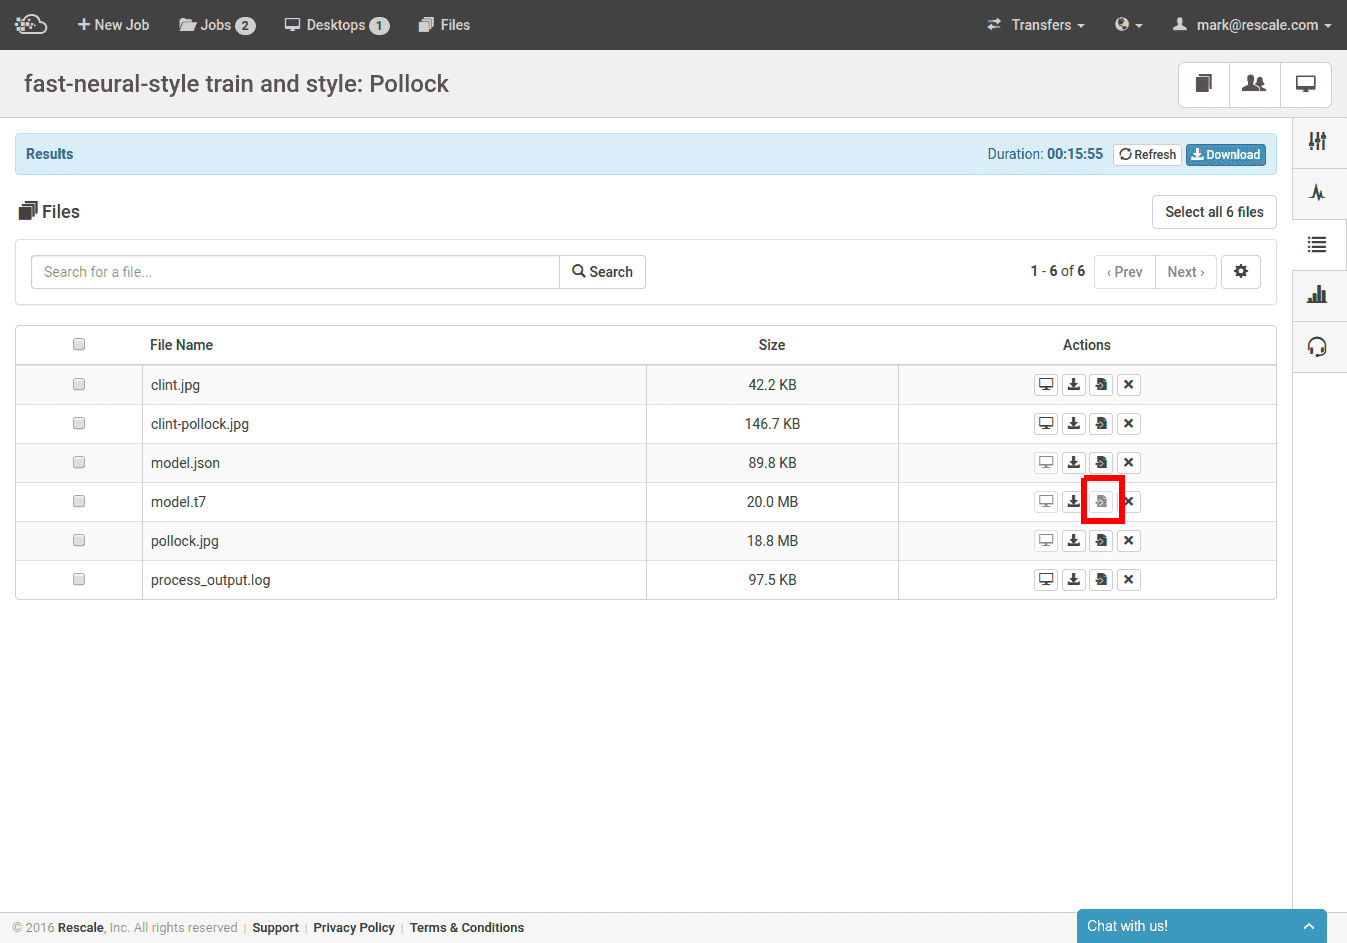
Now we create a new job with the same code repository, our new model file, and some more images to style. You can clone this job on Rescale here.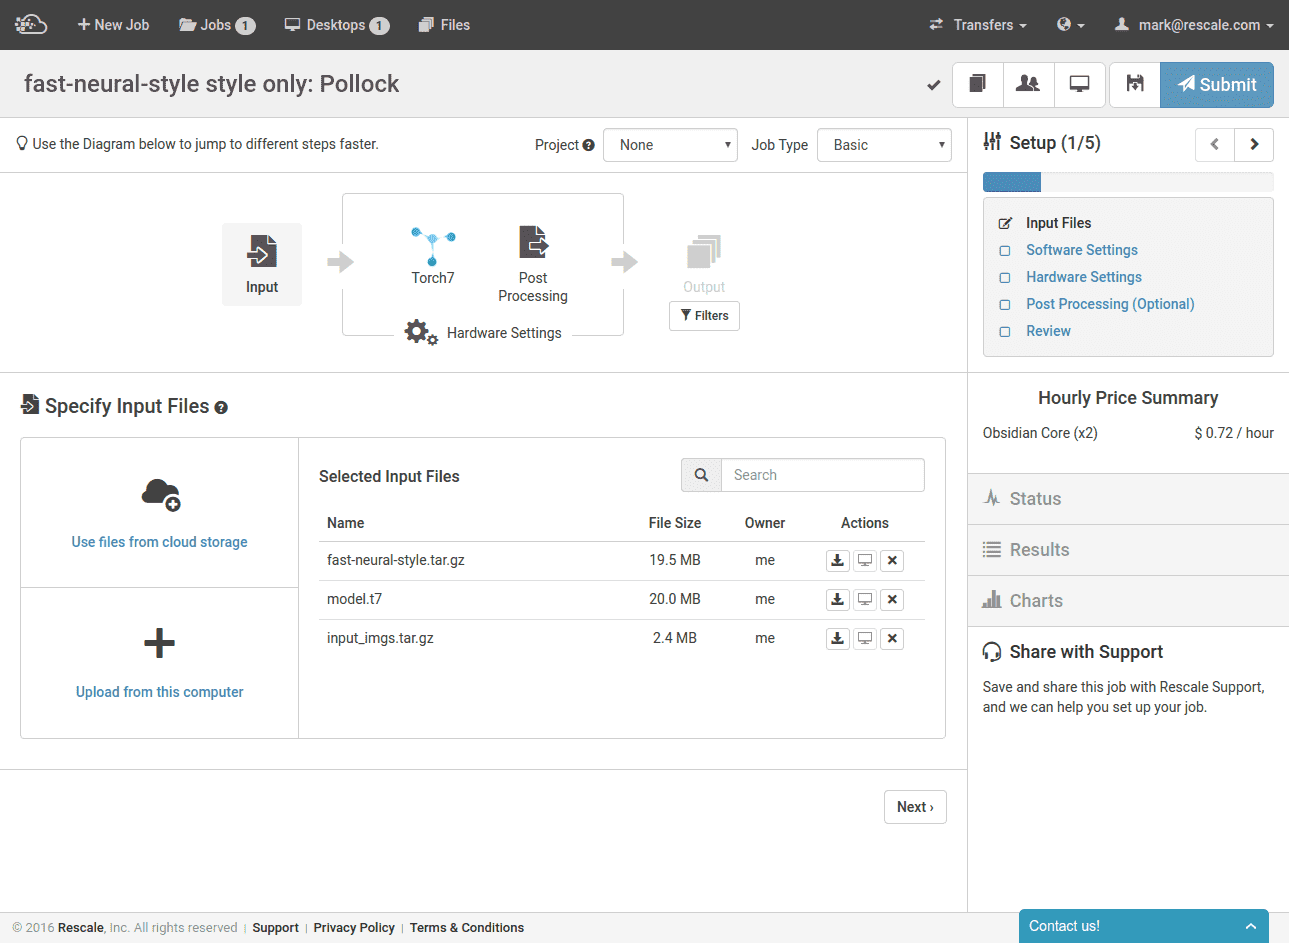
This time, we have uploaded our images as an archive, which will get unpacked after upload and we run fast-neural-style on the resulting input directory. Note how we no longer need to run the more compute-intensive training process.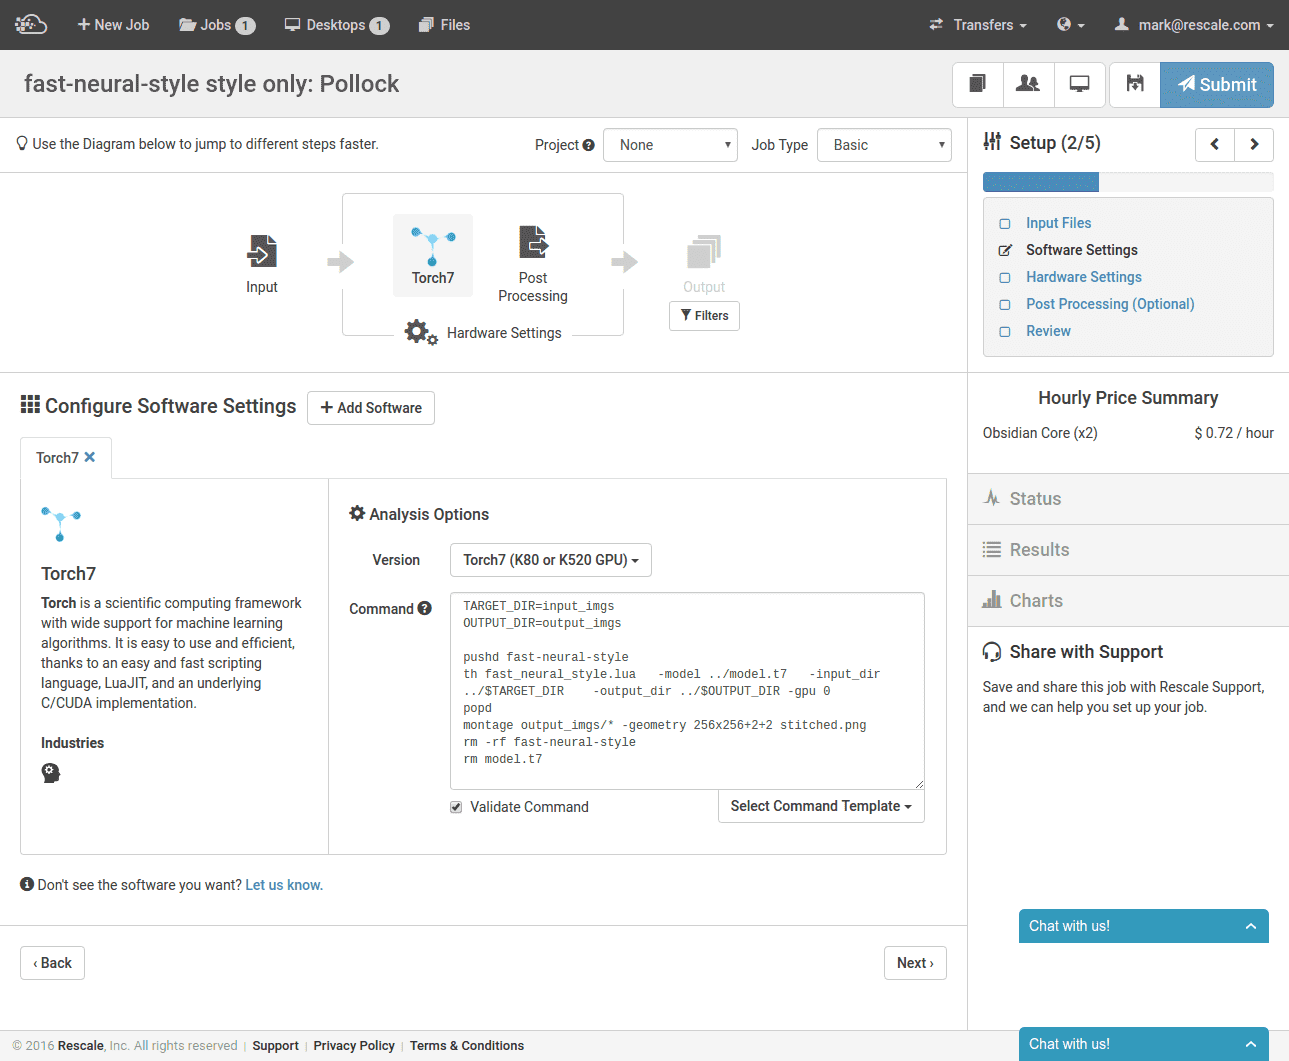
Once the training completes, the styled images appear in output_imgs in the results: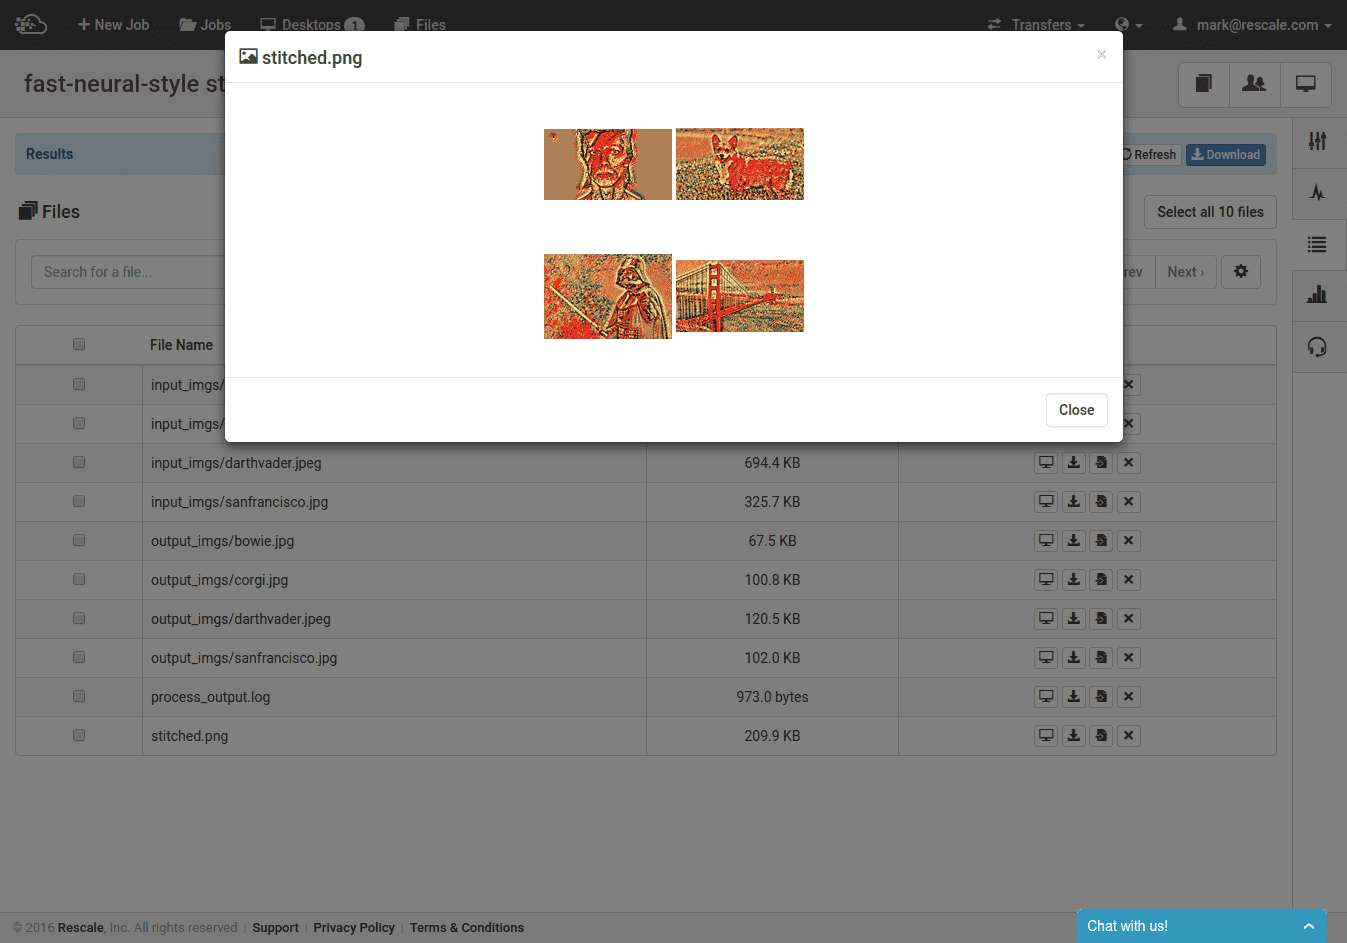
*Special thanks to Mark Whitney for setting up the technical and instructional aspects for this blog post.