
ANSYS CFX FAQs
This tutorial shows you how to stop a running CFX SolverA solver is a numerical algorithm or a software tool that so... More from the command line. Similar to pressing the stop button in the ANSYS CFX GUI, inserting a stop file executes the stop and writes a restart file at the end of an outer loop iteration in steady state simulations, or at the end of a timestep in transient analyses.
To complete this task, you will need to use our in-browser SSH. Go to the Status page of your job. Then below the Live Tailingalso referred to as real-time log monitoring or live log str... More panel, you will see an SSH panel with a thunderbolt symbol. In the SSH panel, you will see a Servera server is a computer program that provides services to oth... More IP address which you can click to launch an in-browser SSH terminal. This way, you can interact with the running clusterA computing cluster consists of a set of loosely or tightly ... More from your browser.
For more information on using Rescale’s in-browser SSH feature, please refer to the tutorial here.
Stop file option 1 – Using the cfx5stop command
In the terminal window, type the following commands (2 lines):
cd workcfx5stop -directory <temp-directory>
Suppose a run is called MultiphaseMixer_001 in the work directory. Then, there will be a temporary directory called MultiphaseMixer_001.dir in the work directory. The command will be as follows:
cd workcfx5stop -directory MultiphaseMixer_001.dir
Stop file option 2 – Writing a stop file
In the terminal window, type the following command:
touch work/<temp-directory>/stp
Suppose a run is called MultiphaseMixer_001 in the work directory. Then, there will be a temporary directory called MultiphaseMixer_001.dir in the work directory. The command will be as follows:
touch work/MultiphaseMixer_001.dir/stp
Restarting a Job from an original Job
Inserting a stop file will generate a .res restart file that can be used to restart the simulationSimulation is experimentation, testing scenarios, and making... More.
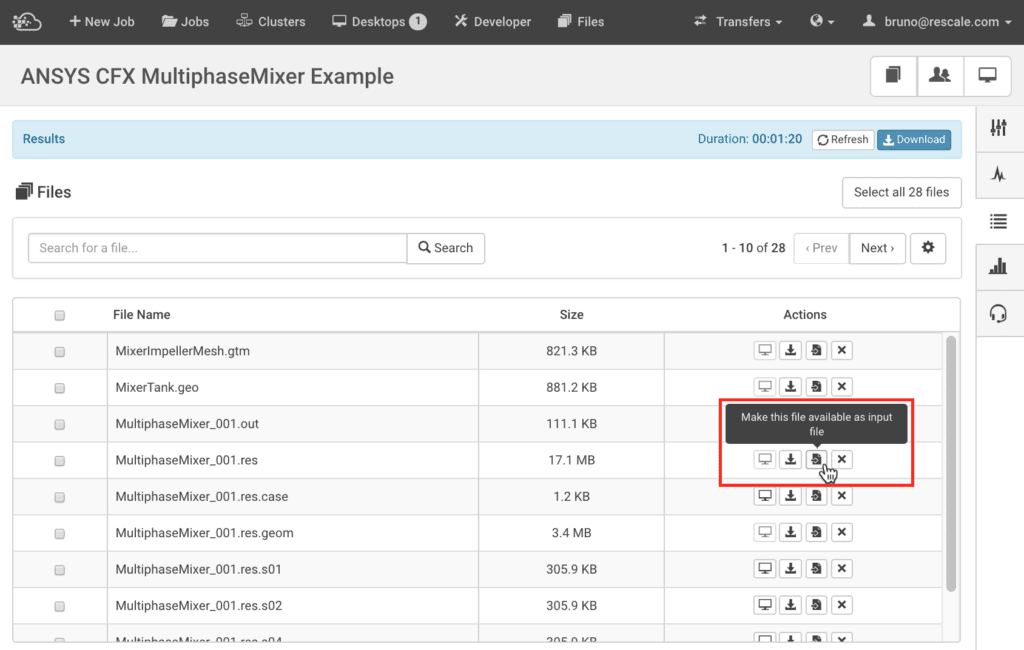
In the Results page of a previously stopped job, you may make the restart file available as an input file (see image below), then clone the job. In the new cloned job, insert the restart file in place of the original input file in the Inputs section.
Following the creation of the cloned job, you will need to change the command in the Software Settings section to include the flag -continue-from-file. The command should look like the example below
cfx5solve -def second_file.def -continue-from-file first_file.res -par-dist $HOSTLIST
Restarting a job with from a single Job
It is possible to create a job that will execute two separate simulations. One simulation with the initial .def file and a second simulation that restarts using the .res file generated from the first. The command for such a job should look like the example below.
cfx5solve -def first_file.def -par-dist $HOSTLIST
cfx5solve -def second_file.def -continue-from-file first_file.res -par-dist $HOSTLIST
Note that in general, in order to run multiple commands you need to add a new line with the appropriate command. Additionally, the platform will not exit until it has finished all the commands.
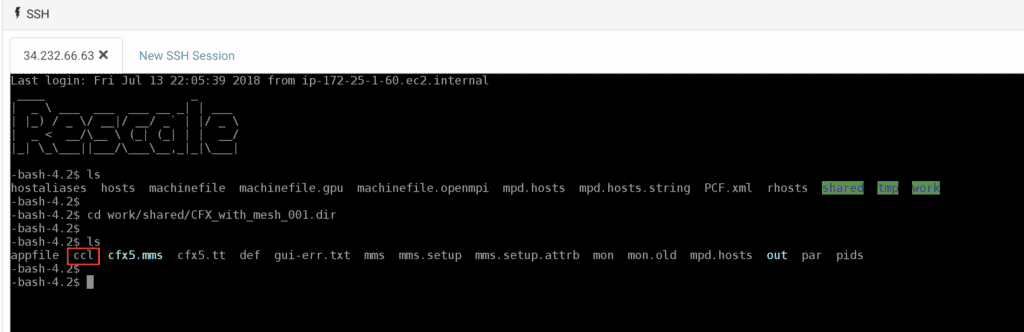
- CFX Command Language (CCL) is the internal communication and command language of ANSYS CFX. During a CFX run, a temporary directory,
<file_name>.diris created in the~/work/shareddirectory on the cluster. The<file-name>.dircontains a ccl file which has all the CFX-Pre settings. Users can edit this file and update the solver with the new settings usingcfx5controlcommand:cfx5control <directory> -inject-commands <file> [-no-backup] - During the run, you can connect to the cluster using Rescale’s in-browser SSH option or through your local workstationA workstation is a powerful computer system designed for pro... More. Please refer to this section for more information about connecting to your cluster.
- Navigate into the temporary
<file-name>.dirdirectory which is present in~/work/shareddirectory. The directory will have a ccl file.
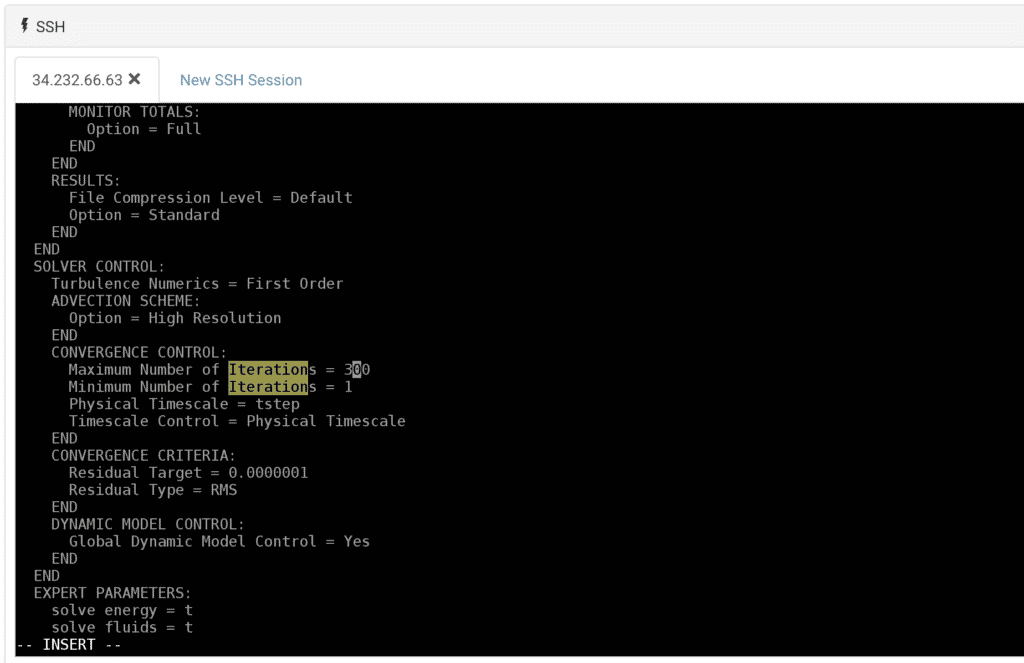
- Open the file using a suitable text editor (like vi or vim). The ccl file is a list of solver settings depending in your modelA numerical, symbolic, or logical representation of a system... More. You can make suitable changes to the settings here (NOTE: Since ccl is a sensitive file, please take care while editing it). Please refer to the ANSYS CFX documentation for more information about CCL and parameters which can be edited.
- You can use
/for searching strings in a long file while using vi or vim. For example, if you are editing the maximum number of iterations, you can search for the string in vi or vim editor by typing/iterations. This will highlight all the instances of this word. You can pressnto move to the next instanceAn Amazon Virtual Machine More. Once you are finished editing the ccl file, save the file.
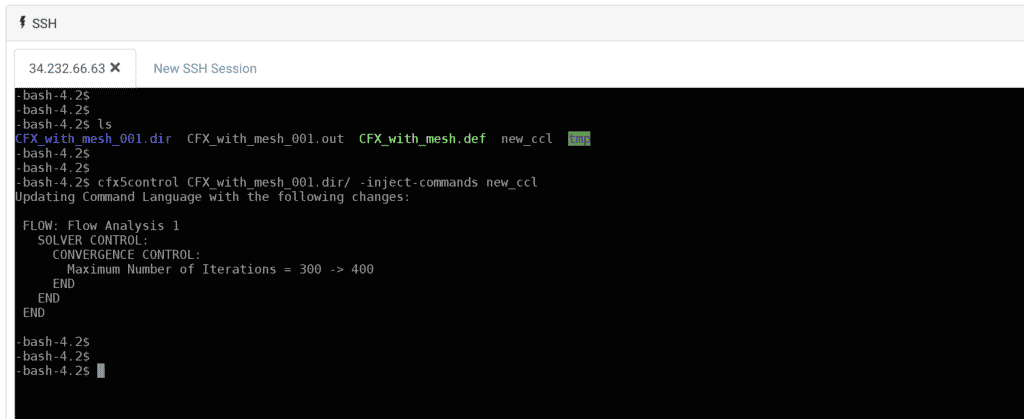
- Copy this new ccl file outside the
<file-name>.dir. To update the solver with the newcclfile, use the command given below. CFX will display all the changes made in the ccl file.cfx5control <file-name>.dir -inject-commands new_ccl
If you do not wish to create a back up file before updating the solver with new settings, include a -no-backup flag at the end of the command.
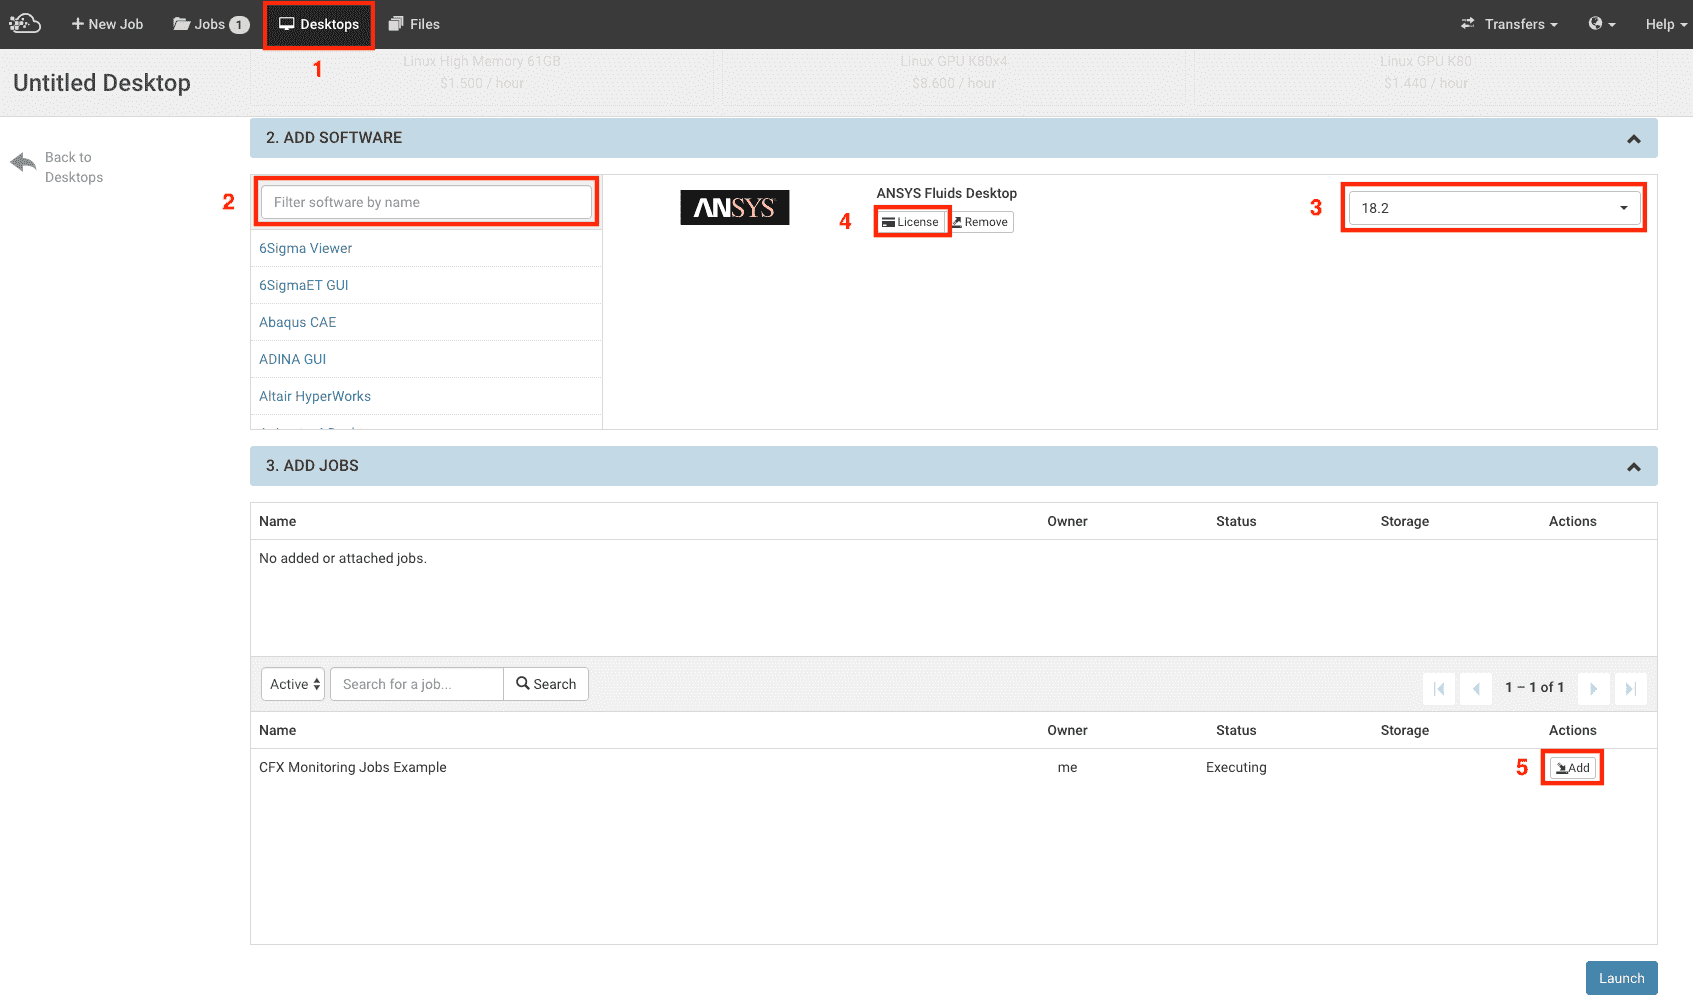
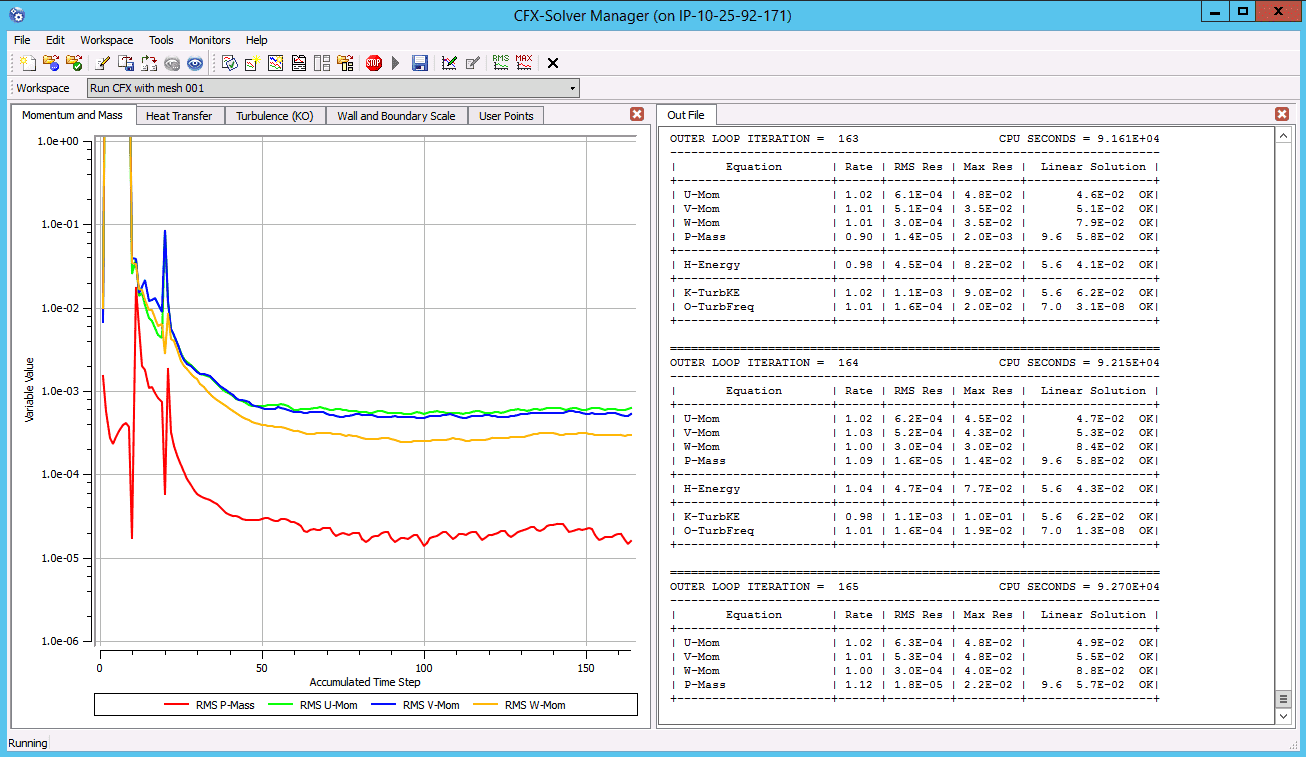
ANSYS CFX jobs can be monitored using the CFX Solver Manager which plots the residuals and the .out file data. To monitor a CFX batch job running on the ScaleX platform, users can attach a running job to a Rescale Desktop and monitor the progress by pointing the CFX Solver Manager to the temporary .dir directory that the CFX Solver creates during a run.
Here are the steps:
- Click on the Desktops icon on the top and click on the + New Custom Desktop icon. Choose a suitable Windows Desktop Configuration.
- Under ADD SOFTWARE, search for ANSYS Fluids Desktop. Select the appropriate version and fill in the required license information.
- Under ADD JOBS, search for your running job and select the job by clicking on Add icon beside the job.
- Finally, click on the Launch button. The Rescale desktop will be launched in a few minutes. The desktop can be viewed using either In-Browser option or using Remote Desktop Connection. Please refer to this section for more details on Rescale Desktops.
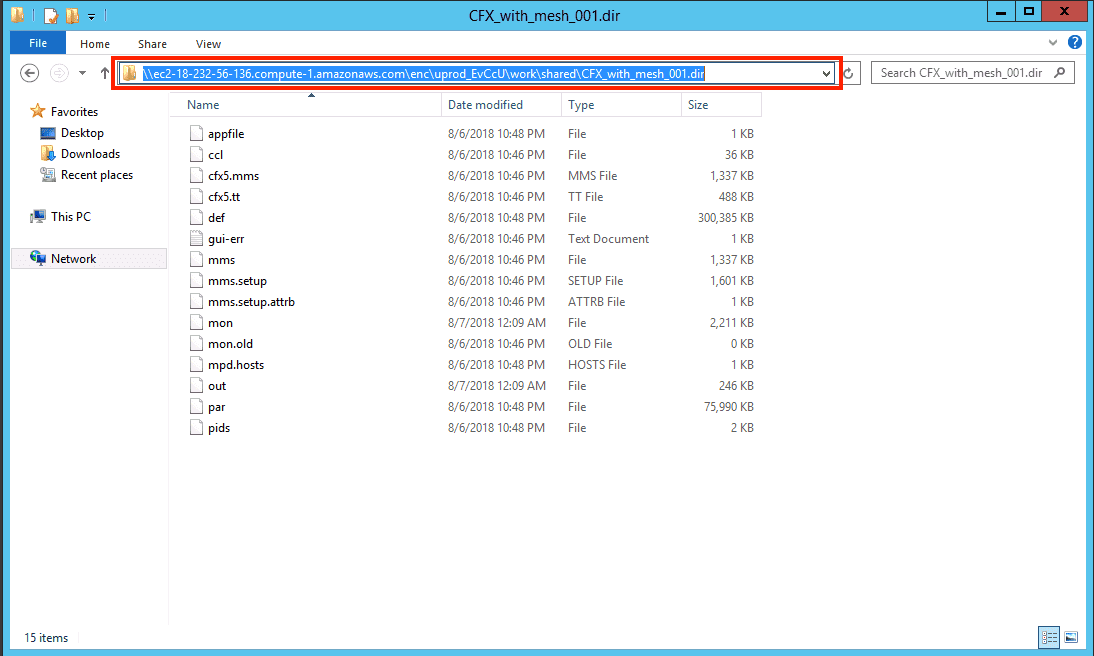
- Before opening the CFX Solver Manager, the path to the
.dirdirectory must be found. On the desktop, open the folder attached_jobs folder and navigate into the jobs folder. Inside the jobs directory, navigate through work > shared > .dir. After opening the.dirfolder, copy the path as shown –
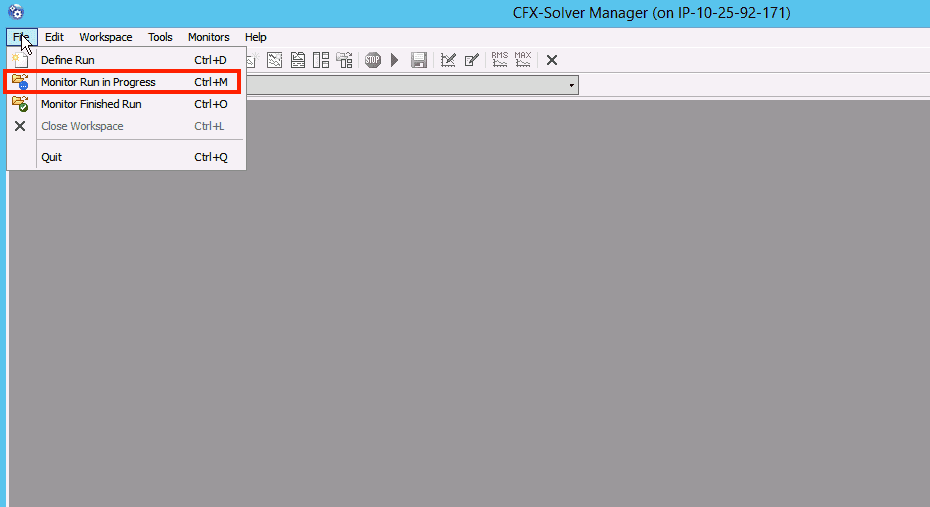
- On the desktop, click on the CFX icon to open the CFX Launcher. On the CFX Launcher, click on CFX-Solver Manager icon.
- Open File > Monitor Run in Progress.
- Paste the path that you had copied earlier in the Directory field and click on Choose. A warning message (Cannot create Monitor Lock File) will appear. Users can ignore this by clicking OK.
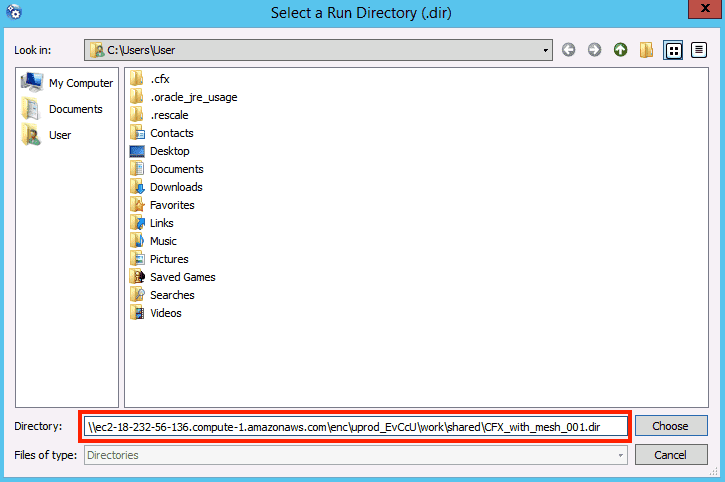
- The Solver Manager will now show the run’s progress and automatically update with each iteration
ANSYS CFX provides options to run simulations with desired precision accuracy. The user can specify the desired precision required for the simulation both globally via -double and locally for a specific procedure -<procedure>-double as follows:
- The CFX default settings, starts single precision versions of Partitioner, Interpolator and Solver
cfx5solve -def MultiphaseMixer.def -par-dist $HOSTLIST
- The flag
-doublestarts double precision versions of Partitioner, Interpolator and Solver.
cfx5solve -def MultiphaseMixer.def -par-dist $HOSTLIST -double
- The flag
-solver-doublestarts double precision version of CFX Solver only.
cfx5solve -def MultiphaseMixer.def -par-dist $HOSTLIST -solver-double
Note: Please use -solver-double the solver only double precision flag carefully, as this might cause compatibility errors between single precision Partitioner and double precision Solver.