
Simcenter STAR-CCM+ FAQs
To run Simcenter STAR-CCM+ on Rescale, the standard STAR-CCM+ command-line interface can be used:
starccm+ -power -np <mpi-ranks> -machinefile $HOME/machinefile -batch <batch-script>
Common flags:
-batch
Run in batch mode (no UI). Commands: run, step, mesh, or <.java macro file>
-np
Specify the number of parallel processes. By choosing $RESCALE_CORES_PER_SLOT you are passing in the number of cores you selected for the job, thereby setting up a DMP job.
-power
This option is essential when using the Rescale provided On-Demand License or your own Power Session License
-rsh Set multinode communication. Commands: rsh or ssh
For example:
For a job with a script:
starccm+ -power -rsh ssh -np $RESCALE_CORES_PER_SLOT -machinefile $HOME/machinefile -batch macro.java -load input.sim
For a job without macro:
starccm+ -power -rsh ssh -np $RESCALE_CORES_PER_SLOT -machinefile $HOME/machinefile -batch run -load input.sim
We recommend using a single nodeIn traditional computing, a node is an object on a network. ... More for batch jobsBatch jobs are automated tasks submitted to a computing syst... More that only intend to mesh. You can use multiple cores on the single node to allow more memory.
To only mesh a given set of input file using Simcenter STAR-CCM+ for a batch job, the standard STAR-CCM+ command-line interface can be used as below:
starccm+ -power -np $RESCALE_CORES_PER_SLOT -machinefile $HOME/machinefile -batch mesh -load input.sim
To mesh and run a given set of input file, use the following command:
starccm+ -power -np $RESCALE_CORES_PER_SLOT -machinefile $HOME/machinefile -batch mesh,run -load input.sim
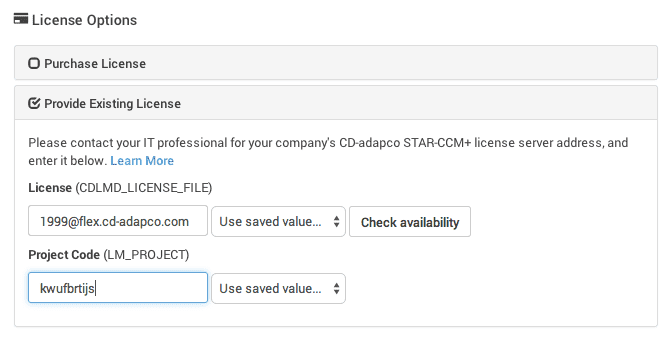
You will require a valid Simcenter STAR-CCM+ license when setting up your STAR-CCM+ job on Rescale. A Power-on-demand (POD) license can be referenced on the Software Setup section of the job setup. Having selected Simcenter STAR-CCM+ as the software you wish to use, under License Options select Provide Existing License and enter the following information into the license fields:
- Enter 1999@flex.cd-adapco.com into the License field
- Enter your product code into the Project Code field (Your project code is a set of random characters and can be found on the CD-Adapco Steve Portal)
How can I remotely access running Simcenter STAR-CCM+ Jobs using the client on my desktop?
This tutorial shows you how to remotely connect to your Simcenter STAR-CCM+ job (running on Rescale clusterA computing cluster consists of a set of loosely or tightly ... More) using the Simcenter STAR-CCM+ client on a desktop.
First, you will need to set up and launch a Simcenter STAR-CCM+ job through Rescale (read here). At the Software Settings page, you will need to include the -collab flag into the command box before the -batch command. For example:
starccm+ -power -collab -batch run -load <input-file>
Once the cluster is up and the job is running, you can monitor the status of your job. Do note that there is a slight difference between the methods of connection using a Rescale Desktop and using your personal workstationA workstation is a powerful computer system designed for pro... More.
Connecting from Rescale Desktop
Please open up the process_output.log file. At approximately line 20 of the log, you can find the servera server is a computer program that provides services to oth... More information.
You can read the file through the live tailingalso referred to as real-time log monitoring or live log str... More window if the line is still visible, else you will first need to download the file or expand the number of lines shown (use the icon on the top right hand corner of the black live tailing window).
For example:
Server::start -host ip-10-25-38-85.ec2.internal:47827
Or
Server::start -host p2089980000000:47827
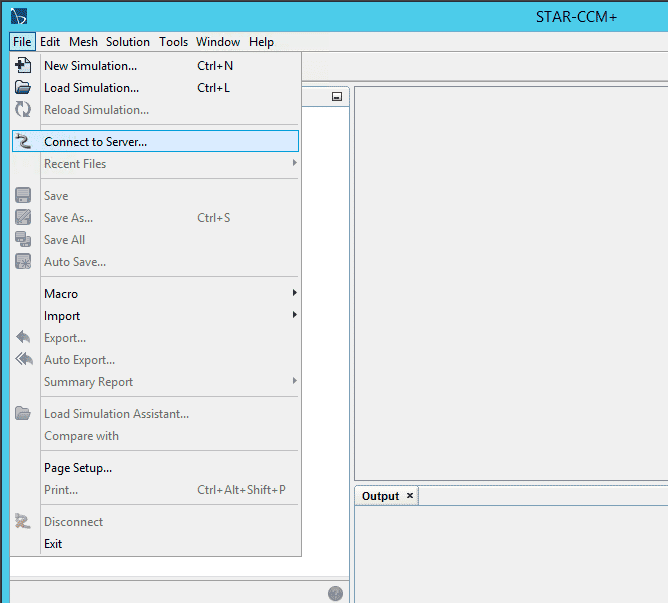
Next, launch the Simcenter STAR-CCM+ client on your Rescale Desktop and navigate to File > Connect to Server…
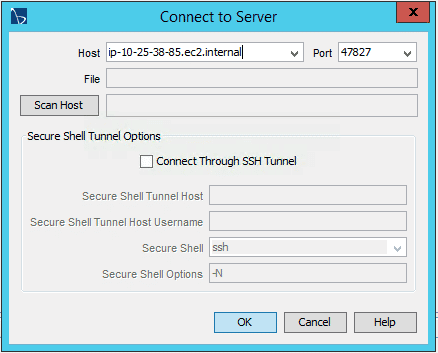
Next, enter the server information (extracted above) in the following format, and click OK (see below). You will now be connected to your running job.
Connecting from your Personal Workstation
If you are using your personal workstation, you would need to first set up an SSH tunnel to the remote cluster. (Note: your SSH key has to be set up on your Rescale Account Settings BEFORE you launch the job). It is recommended that you utilize the Pageant extension of the PuTTY suite. If you need guidance on how to use PuTTY and Pageant, please refer to our SSH Documentation.
For Windows:
Ensure Pageant is running and that your key is added. Next open a command prompt and enter the following command:
plink -ssh <user>@<ip> -L 47827:localhost:47827 -N -v
For Linux:
ssh -i </path/to/key> <user>@<ip> -L 47827:localhost:47827 -N -v
Note that for some corean individual processing unit within a multicore processor o... More types you will need to specify the port 32100 in the command. The flag ** -P** is used for this purpose. For Pageant, this flag is case sensitive and should remain upper case.
For Windows:
plink -ssh -P 32100 <user>@<ip> -L 47827:localhost:47827 -N -v
For Linux:
ssh -i -p 32100 </path/to/key> <user>@<ip> -L 47827:localhost:47827 -N -v
Note: You can extract the <user>@<ip> information under the Job Logs section on the Status Page of the Rescale Web UI.
When prompted to trust the host and store the key in cache, enter y or yes.
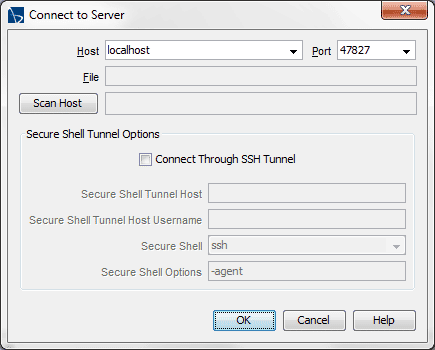
Lastly, return to the Connect to Server popup on the Simcenter STAR-CCM+ client and enter localhost in the Host field and 47827 in the Port field, and click OK.
Monitor and Control your Running Job
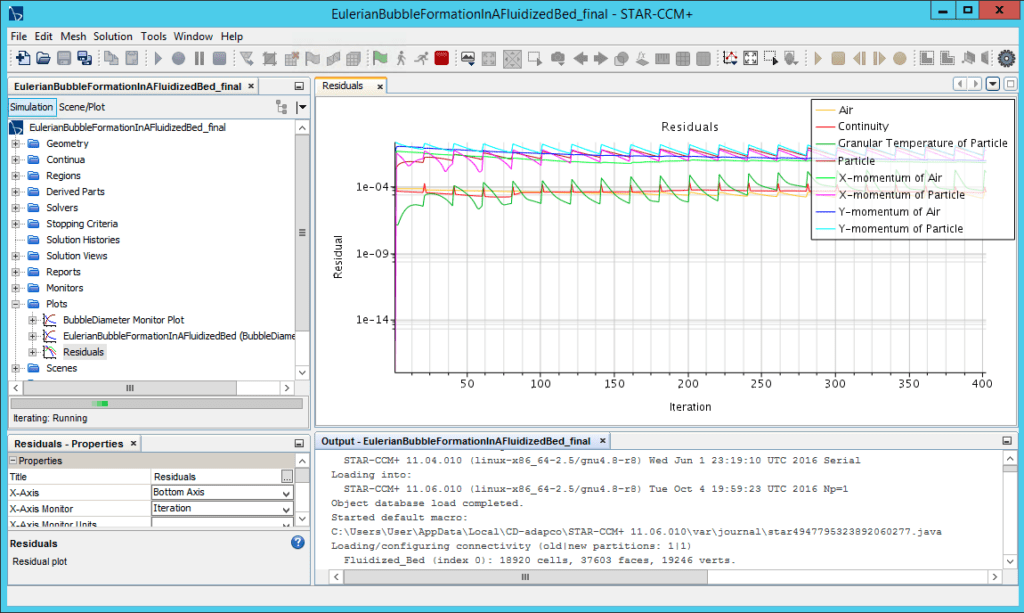
You should now be connected to your running job, and you are able to track the job output on the client window:
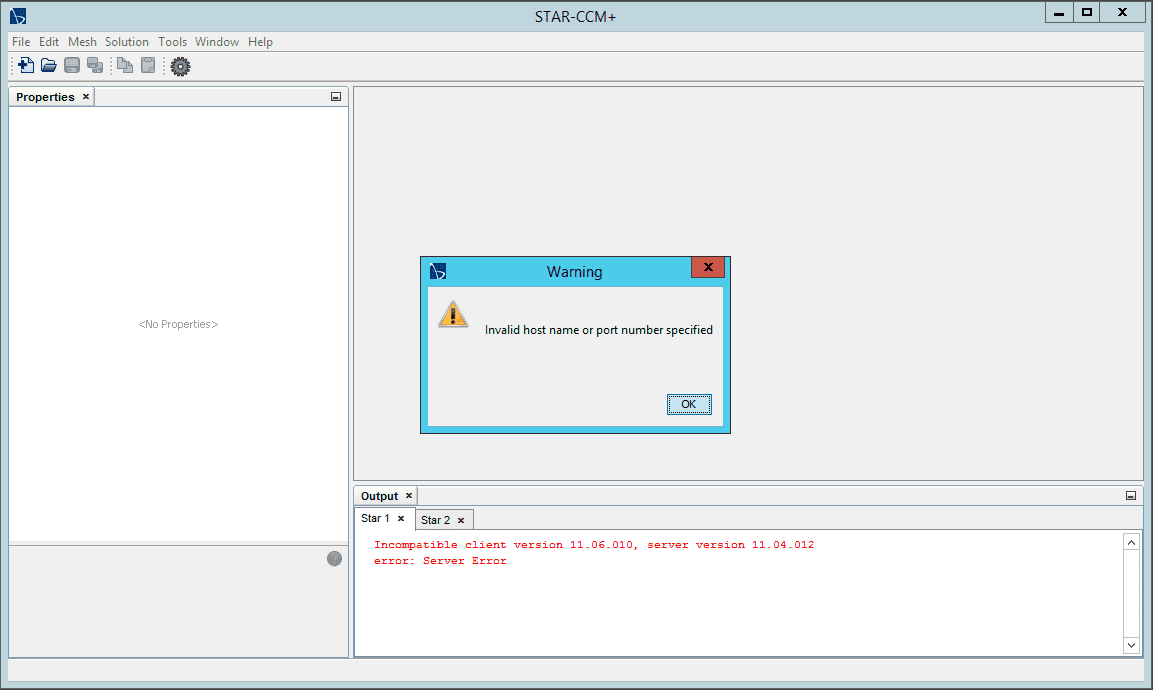
Note: This only works if the version of the client on your desktop exactly matches the version of Simcenter STAR-CCM+ you have selected and run on the Rescale platform. If not, you will get the error shown below:
This tutorial shows you how to save a CHECKPOINT file and a stop (ABORT) file. Simcenter STAR-CCM+ only polls for these files every minute.
To complete these tasks, you will need to use our in-browser SSH. To do so, go to the Status page of your job. Under the Live Tailing panel, you will see an SSH panel with a thunderbolt symbol. In the SSH panel, you will see a Server IP address which you can click to launch an in-browser SSH terminal. This way, you can interact with the running cluster from your browser.
For more information on using Rescale’s in-browser SSH feature, please refer to the tutorial here.
Checkpoint file
STAR-CCM+ queries for the existence of a CHECKPOINT file within the run directory. To change its behavior navigate to File > Auto Save…
To insert a CHECKPOINT file, enter the following commands in your SSH session (2 lines). cd work touch CHECKPOINT
The commands above will insert a CHECKPOINT file in the job directory running in the cluster. This action triggers Simcenter STAR-CCM+ to save at the end of the current step (iteration in a steady case, time-step in a transient case). This action saves the new simulationSimulation is experimentation, testing scenarios, and making... More (.sim) file in the results directory and thus appears in the Results page of the job.
In addition, both the trigger and the original input (.sim) files will be saved in the results directory and will be renamed with a ~ appended at the end of the filename.
It’s important to distinguish between the two simulation files. The new .sim file is the saved file at the current iteration. An example is shown below.
- Original input file (renamed):
combustor_case.sim~ - New saved file:
combustor_case.sim
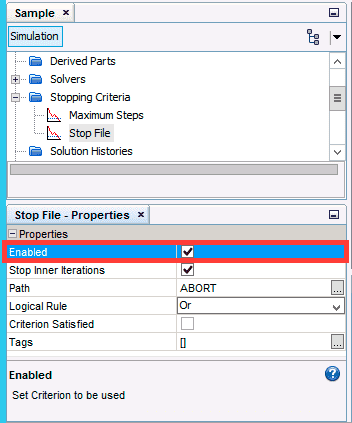
When this is enabled, enter the following commands in your SSH session (2 lines): cd work touch ABORT
The commands above will insert a stop file (ABORT) in the job directory running in the cluster. This action triggers Simcenter STAR-CCM+ to save at the end of the current step and exits the program. This action creates a new simulation (.sim) file saved at the end of current iteration, with a (@) and iteration number appended to the filename.
In addition, both the stop and original input (.sim) files will be saved in the results directory, but they are not renamed.
To distinguish between the two simulation files, the new .sim file containing the number of the current iteration is the saved file.
- Original input file:
combustor_case.sim - New saved file:
combustor_case@00400.sim
Note: If running interactively, a job can also be stopped within the Simcenter STAR-CCM+ GUI by pressing the Stop Iterating button located on the top toolbar.