
Hardware Filters
Updated: January 4, 2023
Overview
This page describes how to set up Hardware Filters and assign the filters to a group.
Setting Up Hardware Filters
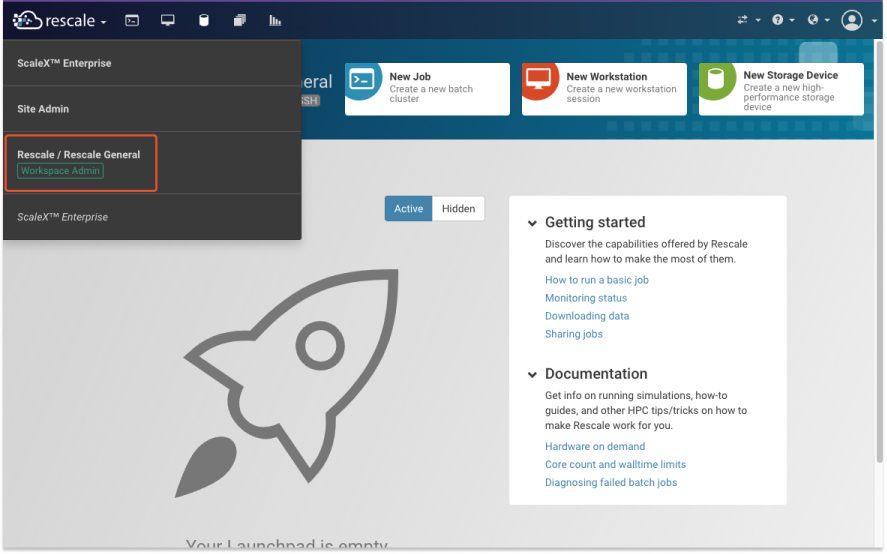
- From the drop-down menu on the top left of your home screen, select the workspaceWorkspaces allow rescale customers to create dedicated teams... More for which you have Workspace Admin privileges. This will take you to the Workspace Admin Portal. Note that only users with admin privileges will have access to these pages.
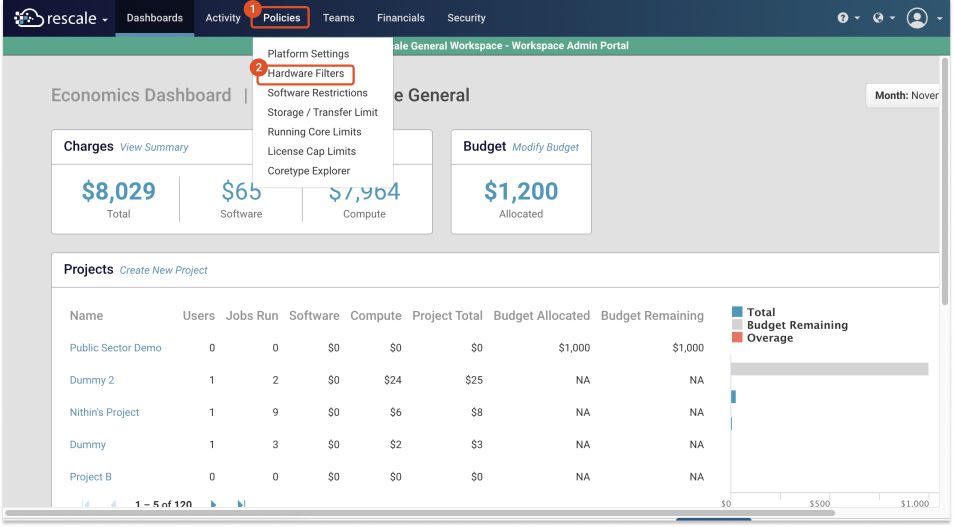
- From the Workspace Admin Portal, open the Policies drop-down menu (1) and select Hardware Filters (2).
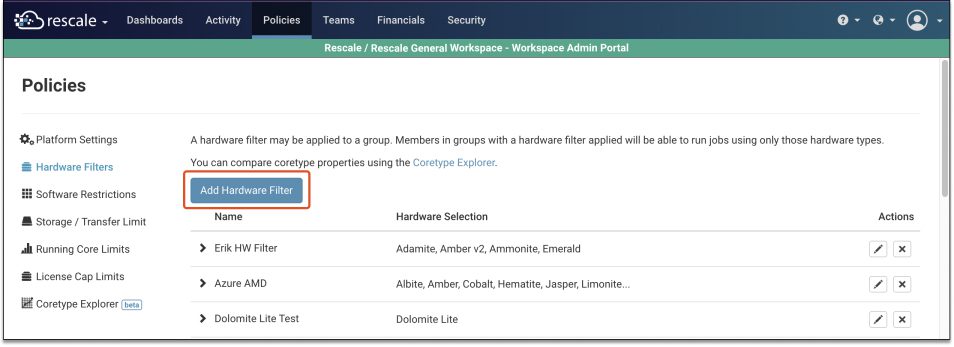
- On the Hardware Filters page, select Add Hardware Filter.
- Enter a name for the hardware filter on the New Hardware Filter screen (1).

- Select or search for the coretypePre-configured and optimized architectures for different HPC... More hardware you want to include in the filter (2 & 3).
- Choose hardware on-demand options for each coretype selected, depending on availability (4).
- On-Demand Priority (ODP)
- On-Demand Economy (ODE)
- On-Demand Reserved (ODR)
- Click Create. The new hardware filter will be added to the list of existing filters on the Hardware Filters page.
Assigning Hardware Filters to a Group
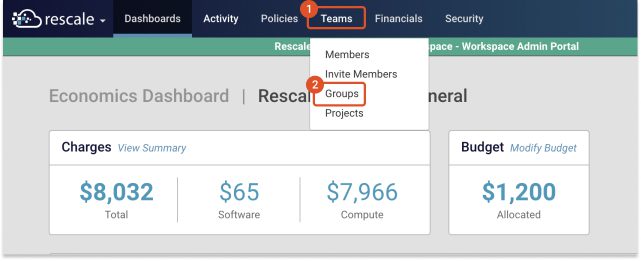
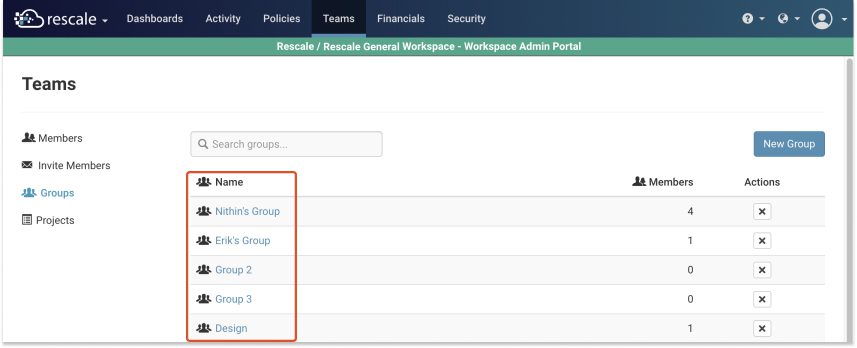
- From the Workspace Admin Portal, open the Teams drop-down menu and select Groups.
- On the Groups page, select the group to which you would like to apply the hardware filter.
- From the drop-down next to Hardware Filters, select a hardware filter.
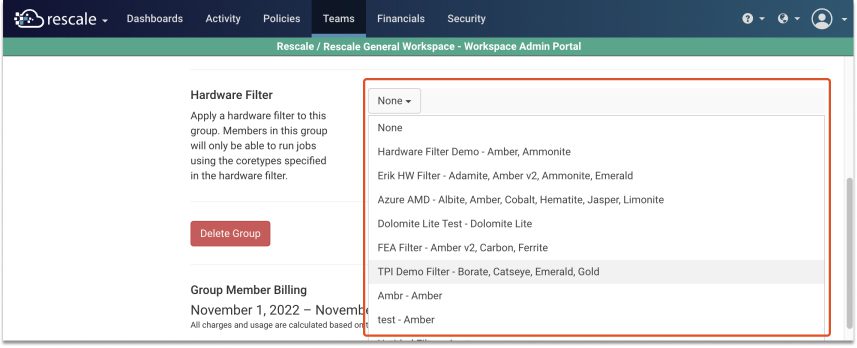
- Select Save.
Next Steps
Now that you have created and assigned your hardware filters, check out the following related topics to better optimize your hardware filter configurations: