
ANSYS Electronics Job Submission using End-to-End Desktops
Introduction
End-to-end Desktops create a seamless HPCThe use of parallel processing for running advanced applicat... More experience on Rescale. End-to-End Desktops is a batch compute clusterA computing cluster consists of a set of loosely or tightly ... More with desktop visualizationVisualization is the representation of complex scientific or... More capability on the head nodeIn traditional computing, a node is an object on a network. ... More of your cluster. It provides a user interface for users to interact with the job setup directly from the analysis software.
Features of End-to-End Desktops
- Enables you to work with your batch job submission interactively. You can monitor jobs on the fly
- Enables you to distribute your batch job submission across the entire cluster using an automated process
- You can pause the analysis at anytime, edit the inputs or parameters of the job and either restart or rerun the analysis
- Job results can be viewed during and right after completion of the simulationSimulation is experimentation, testing scenarios, and making... More without any delays
- Files are automatically synced from the batch job to the Desktop session and vice-versa
- There is no additional charges for the visualization
Key Notes
- The Desktop session is CentOS Linux
- The files are synced to the work directory of the desktop session
- Users need to explicitly terminate the job to shutdown the cluster
- Session files should to be saved to the work folder, after which they will be uploaded to the job files under Results on the platform
ANSYS Electronics Tutorial
This tutorial shows how to submit an ANSYS HFSS job using End-to-End Desktops. The tutorial shows you how to set up an ANSYS Electronics job with a parameter sweep on a 2 node cluster.
Users that submit jobs to the workstationA workstation is a powerful computer system designed for pro... More, are limited to the resources on the workstation. ANSYS provides an option to scale up and submit jobs to a larger, remote cluster. However, the workflow is complicated. End-to-End Desktops automates this process and hence provides the option to submit jobs to a large cluster with ease. ANSYS OptimizationOptimization is a systematic method to determine the values ... More and Parameter sweeps are complicated and End-to-End Desktops provide a seamless methodology to run such jobs on the Rescale platform.
The steps are as follows:
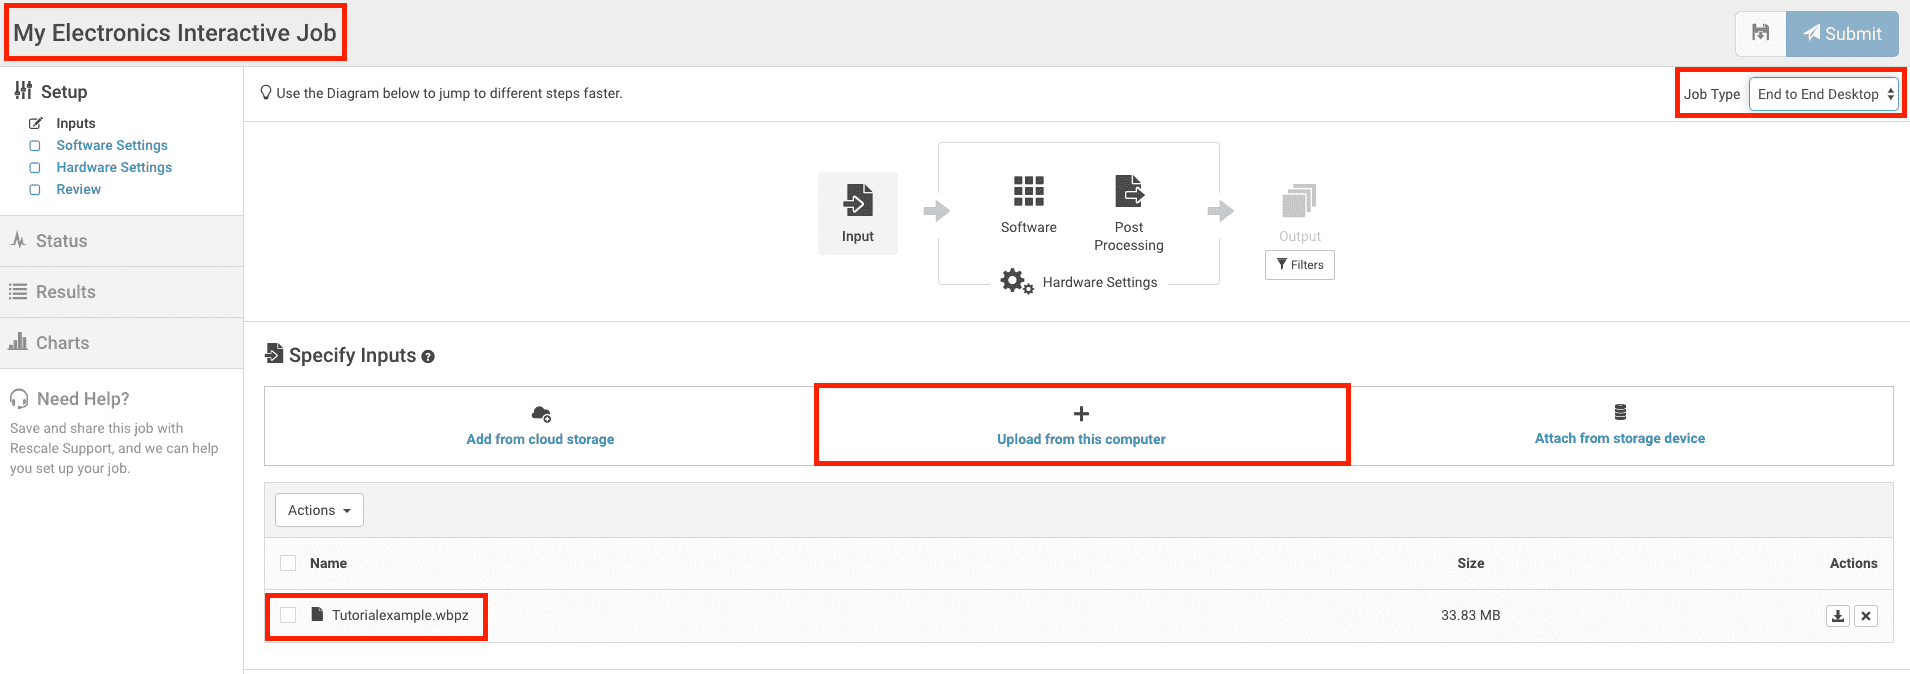
- Click on the + New Job icon on the top left hand corner of the dashboard
- Name the job
- Click on Upload from this computer and browse to the location where the job is saved. Select the file and click Open
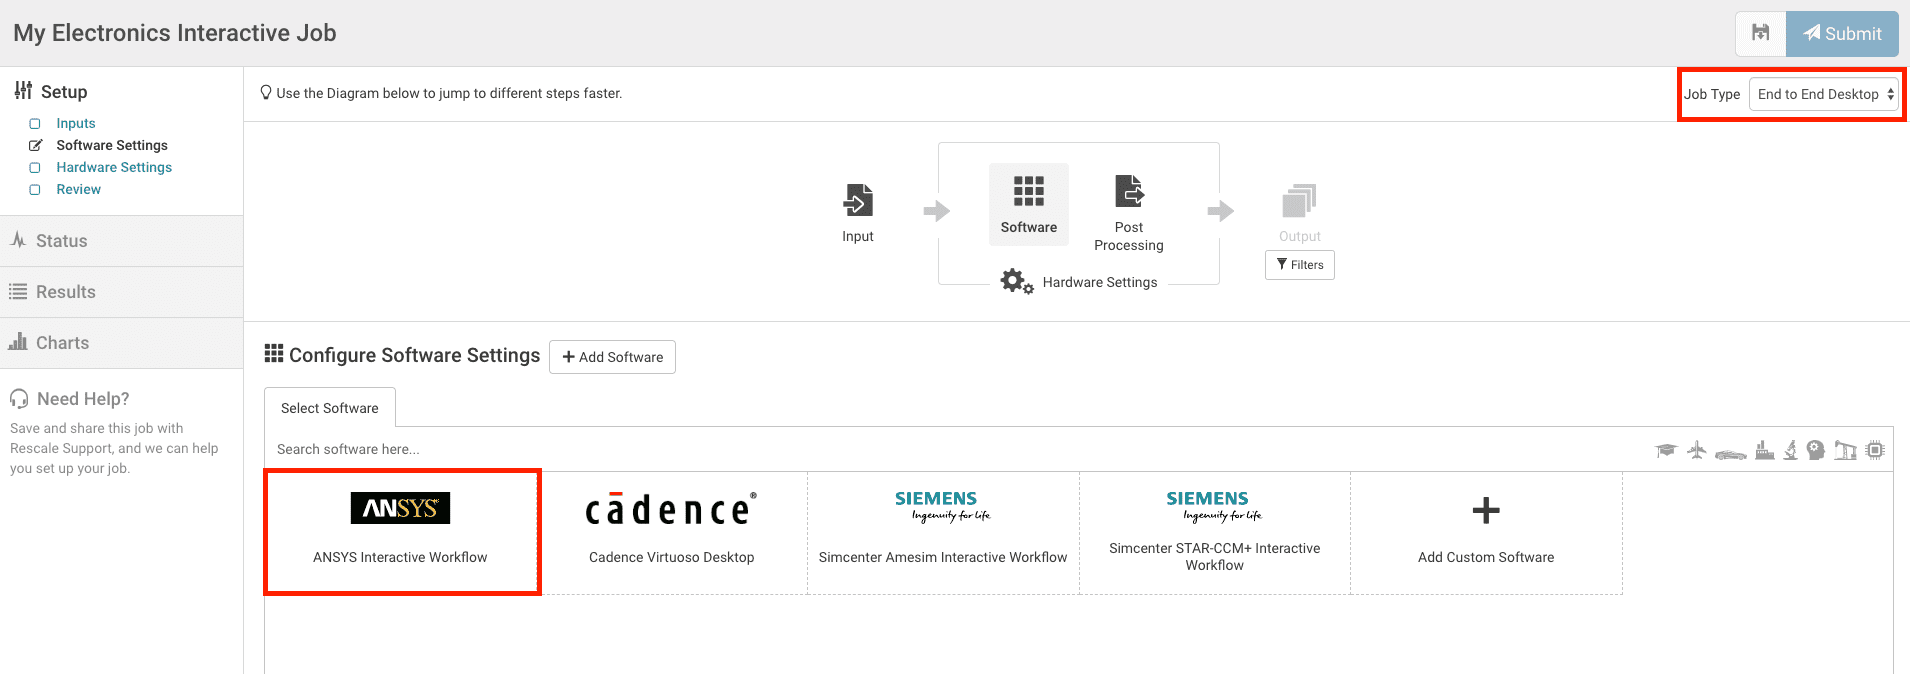
- Jump to the Software Settings page, and select the job type as End-to-end desktop
- Select ANSYS Interactive Workflow
- Click on Next
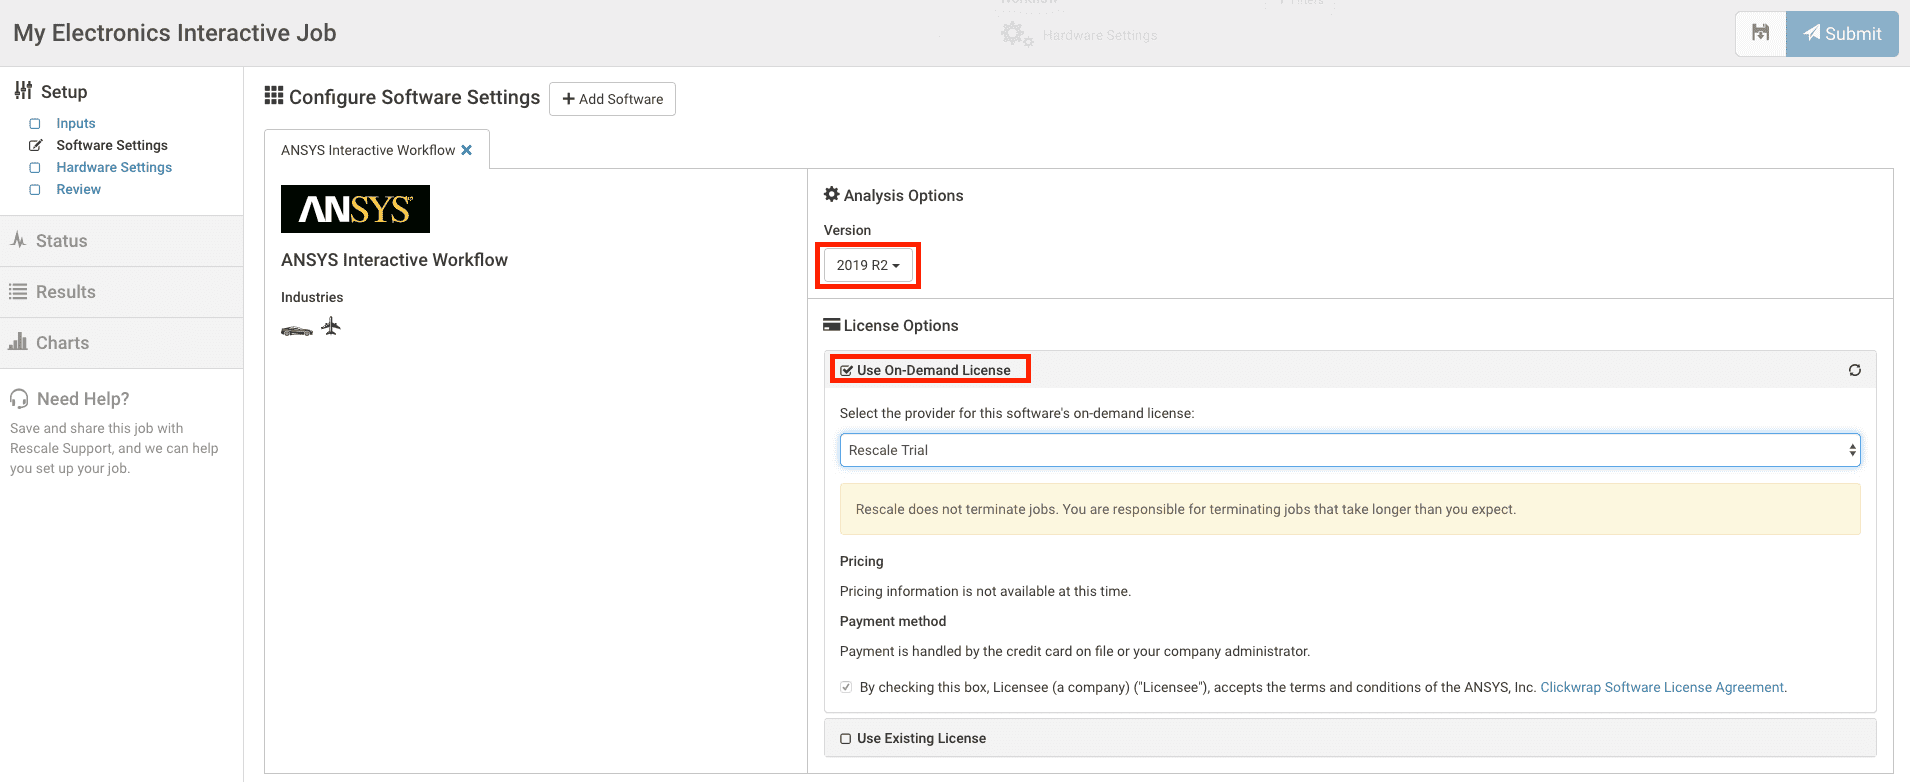
- Select the software version as 2019 R2
- Select the desired licensingLicensing is a legal tool granting users the rights to use, ... More option If you are using a Rescale License, you may select the Use On-Demand License by checking the box as shown below. Also, check the box to agree to the Software Licensing Agreement. Alternatively, users using their own licenses may select the Use Existing License and specify the relevant licensing information.
- Click on Next
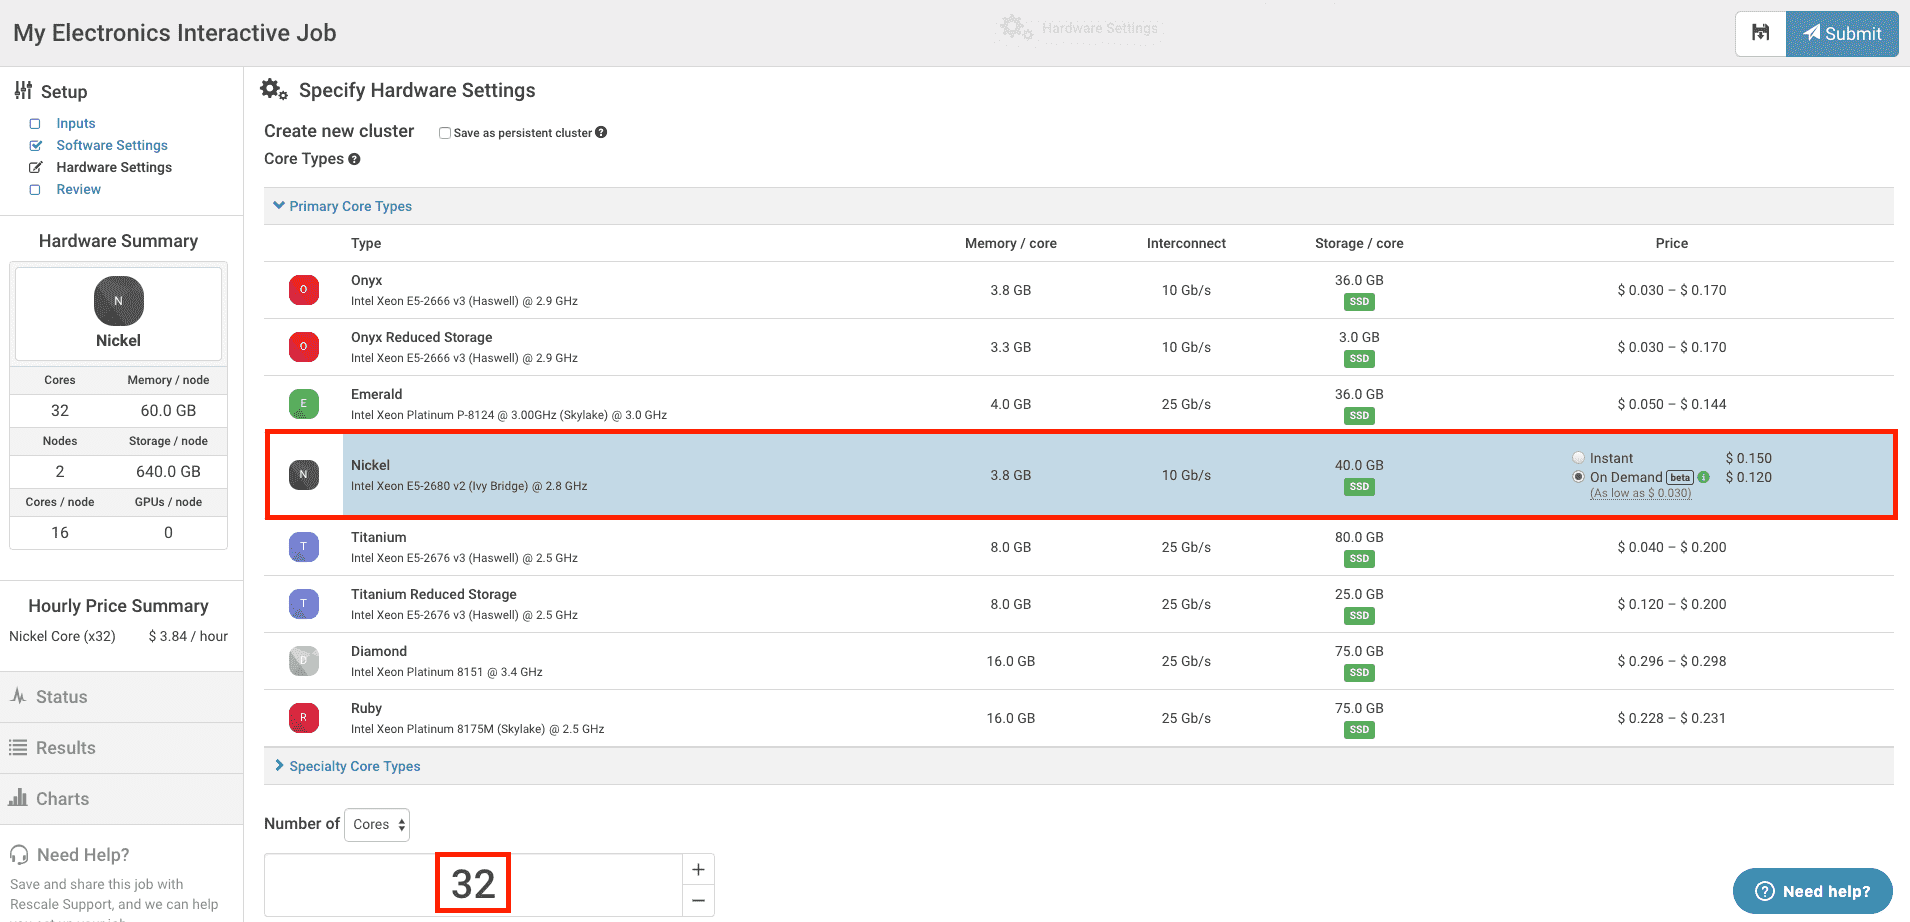
- On the Hardware Settings page, select the hardware configuration that you would like to run your simulation on. In this example, we select the Nickel hardware as shown below
- Set the Number of Cores to 32
- Also, set a suitable wall time so that the cluster will be terminated after the simulation
- Now, you can click on Submit on the top right of the screen
Once the job is launched, you will notice that it looks very similar to a batch job with an additional button to Connect Interactive Session on the top right of the screen
- Go to the Status Tab to view the progress of the job submission
- Click on Connect Interactive Session on the top right of the screen. This will open an in-browser desktop session for End-to-End Desktops that is running Linux. Alternatively, you can connect to your desktop using your choice of VNC client. Instructions on how to do this can be found here.

- Once the Desktop is launched, you will see the icon for ANSYS Electronics Desktop. Click on the icon to launch
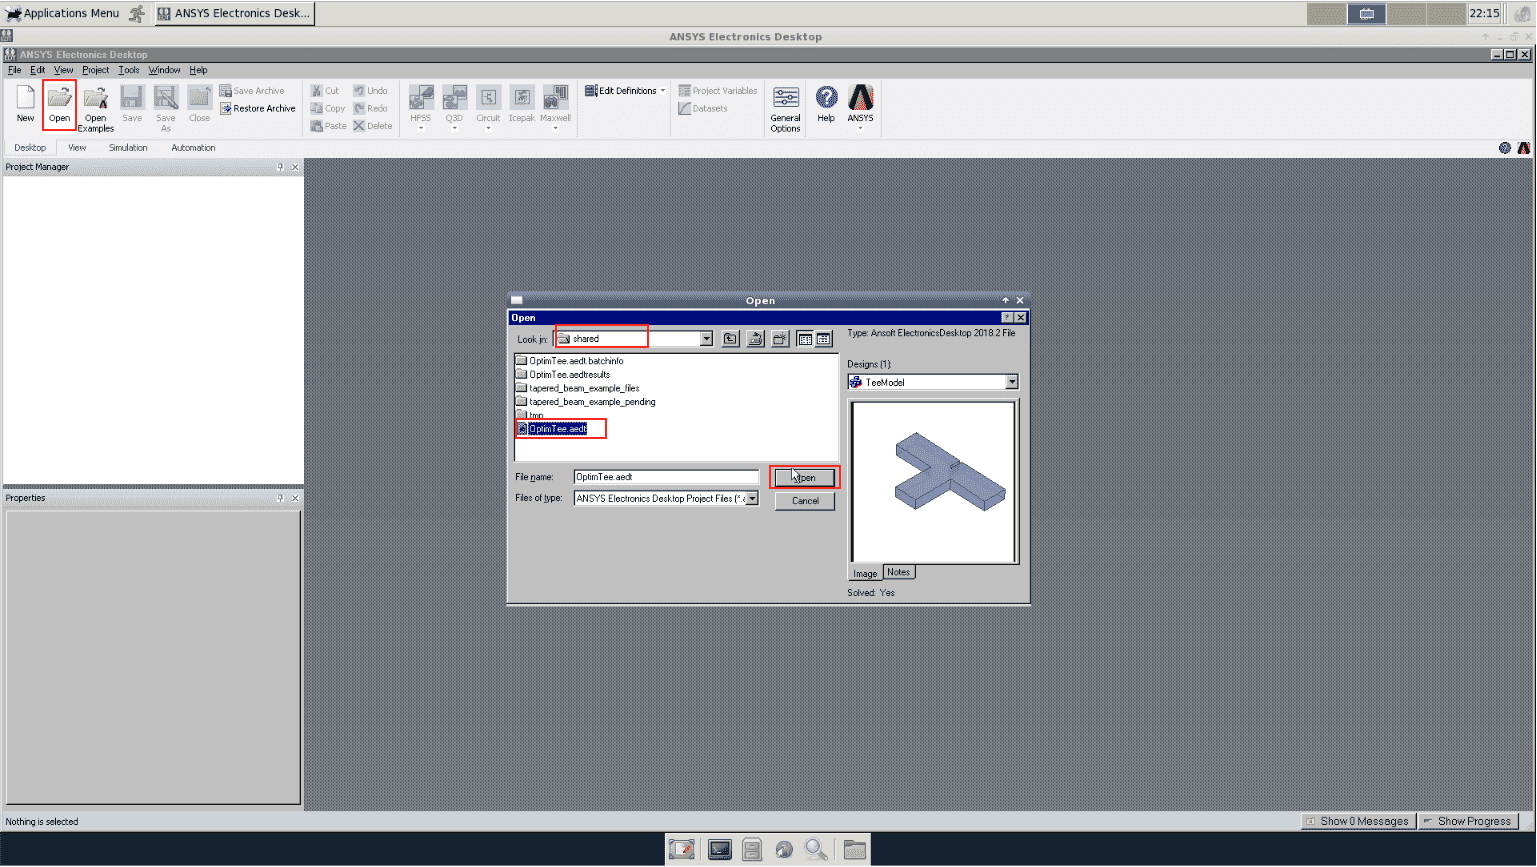
- Once ANSYS Electronics is launched, click on Open. Browse to the shared folder as shown below and select the input file. Click on Open. Note that the input file can be .aedt or .aedtz

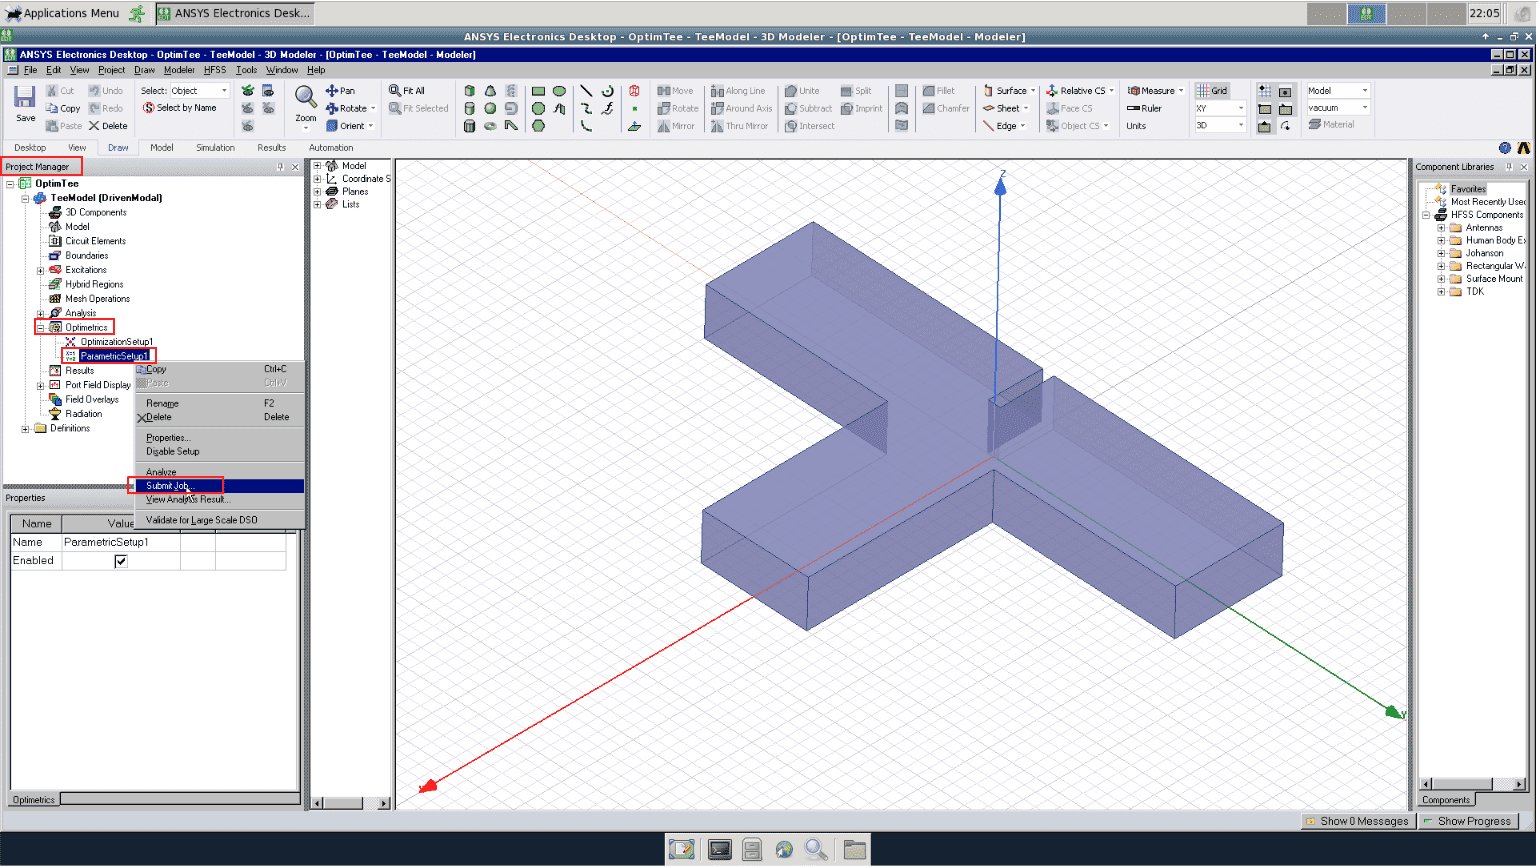
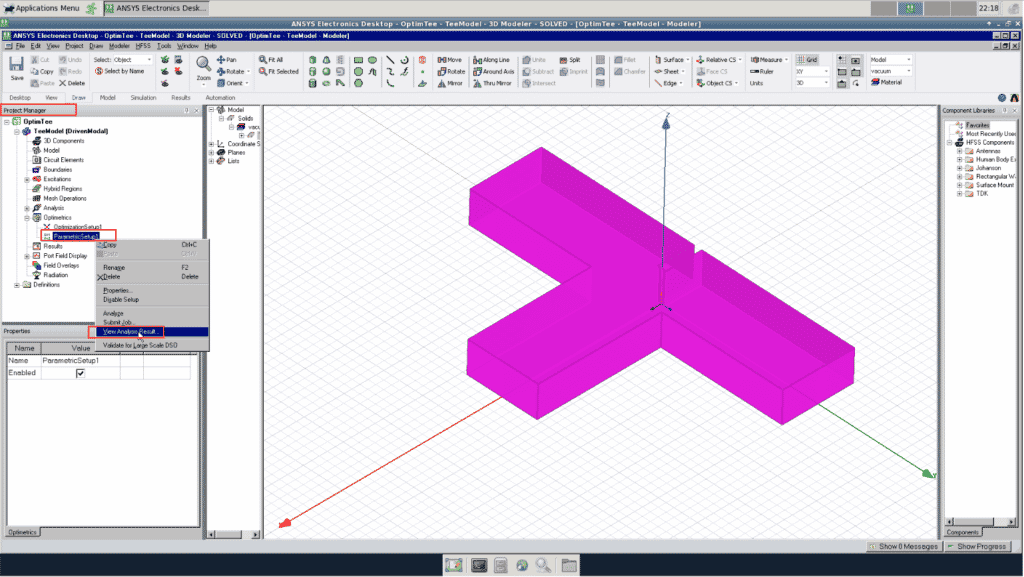
- The Project Manager tree will be displayed on the top left. In this example, we will be solving a parametric sweep found under the Optimetrics entry in the project tree. Navigate to Optimetrics and then to Parametric Setup. Right click on it and click on Submit Job
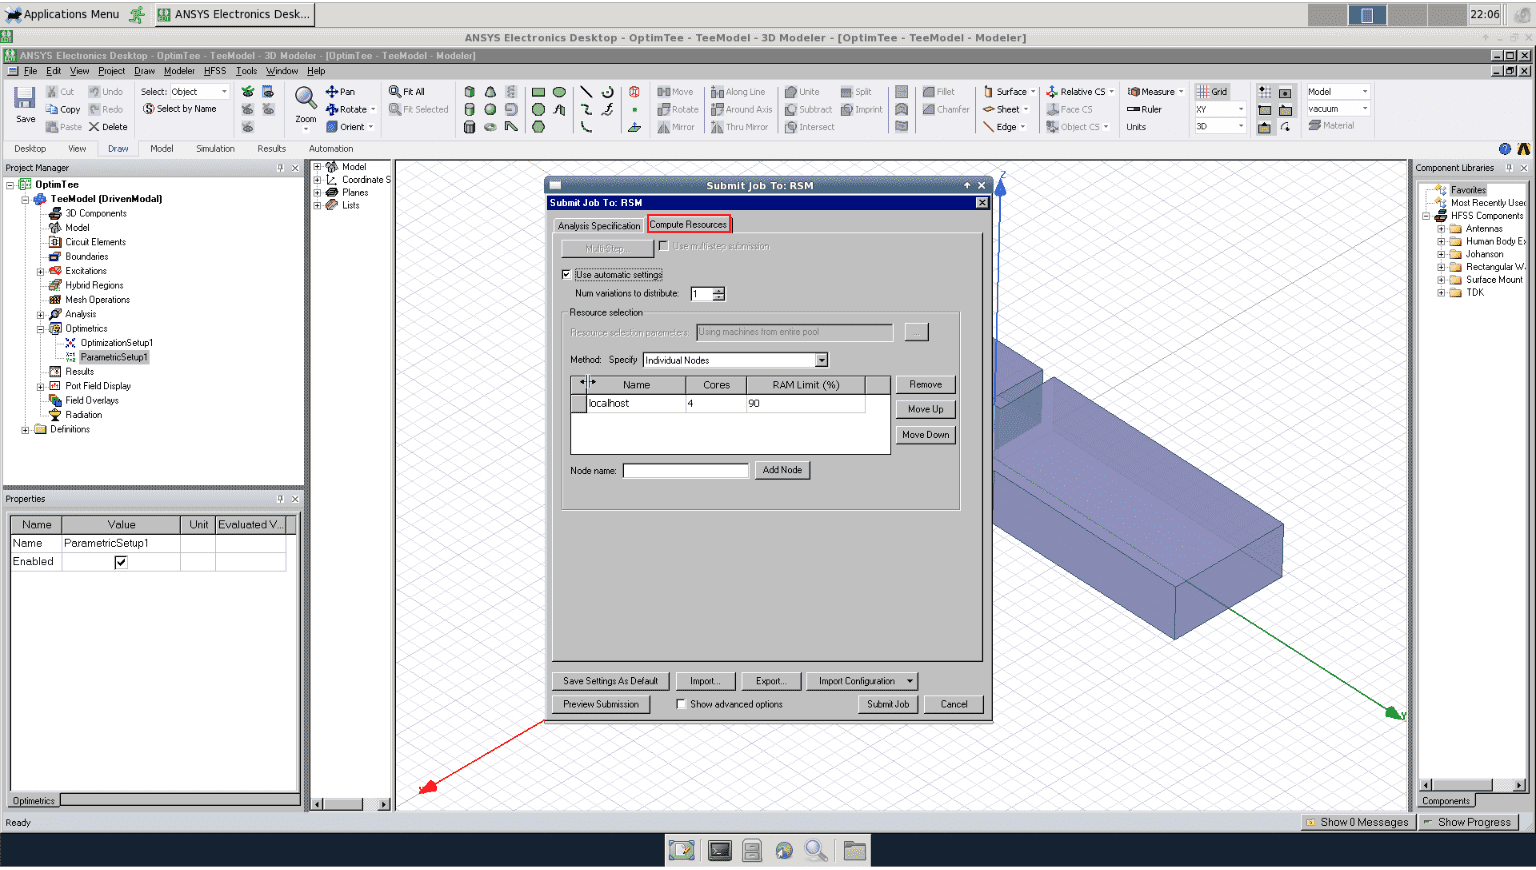
- The will open the Submit Job dialog box. Click on Compute Resources tab on the top
- Click on the Import button and navigate to the cluster_config.areg file located on the Desktop. The cluster_config.areg is auto-generated on cluster start up and contains cluster IP addresses and number of cores on each node. Click on the file and click Open
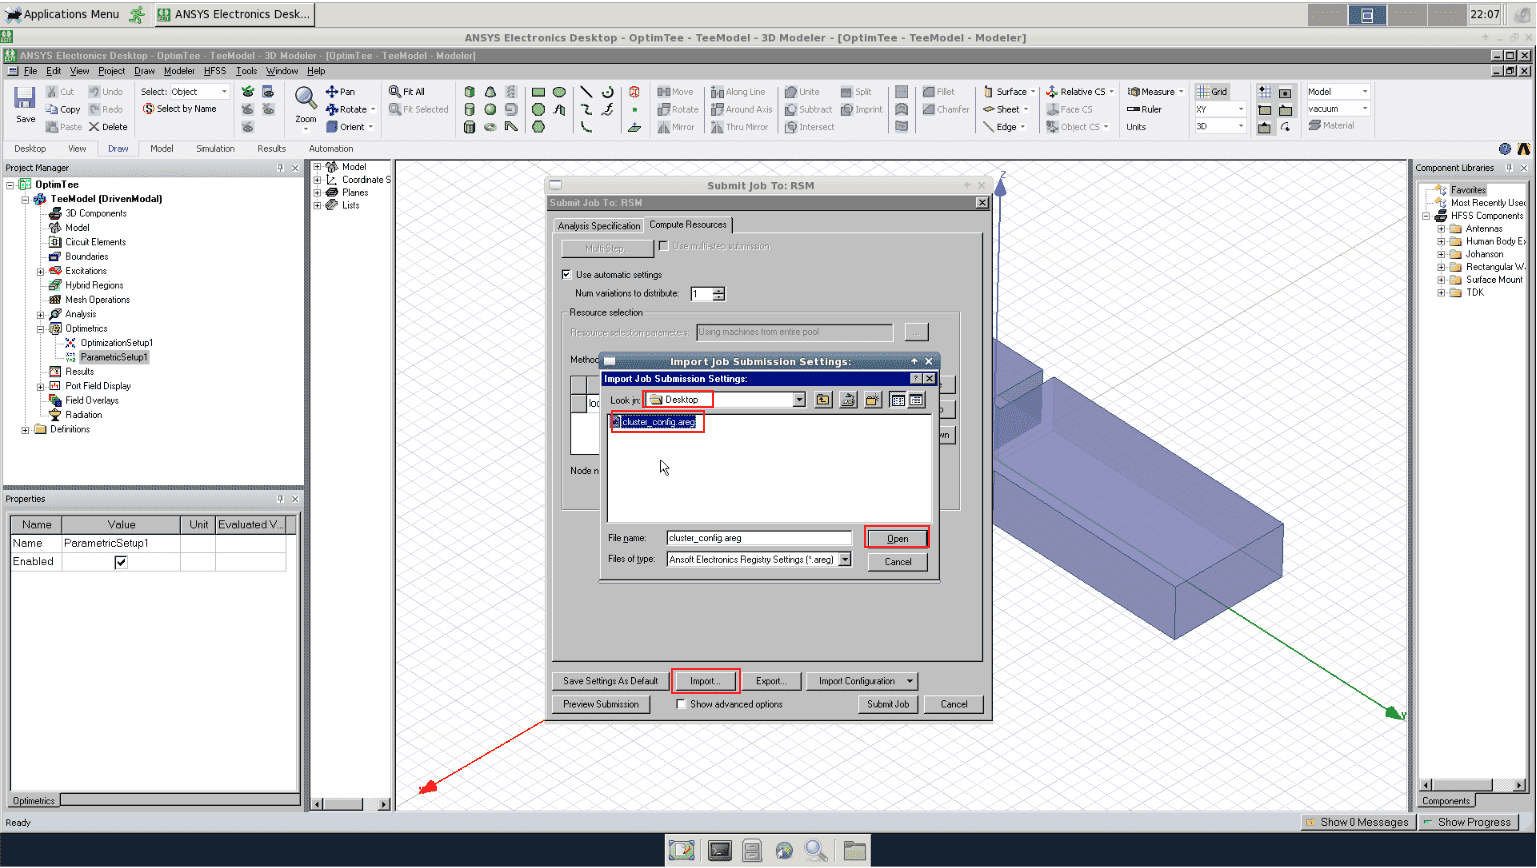
The information from the config file into the dialog box. Please note that when the Use automatic settings checkbox is checked, the tasks are auto-distributed. When unchecked, you can specify the numbers of tasks to solve simultaneously. In the example here, we are auto-distributing the tasks, so the box is checked
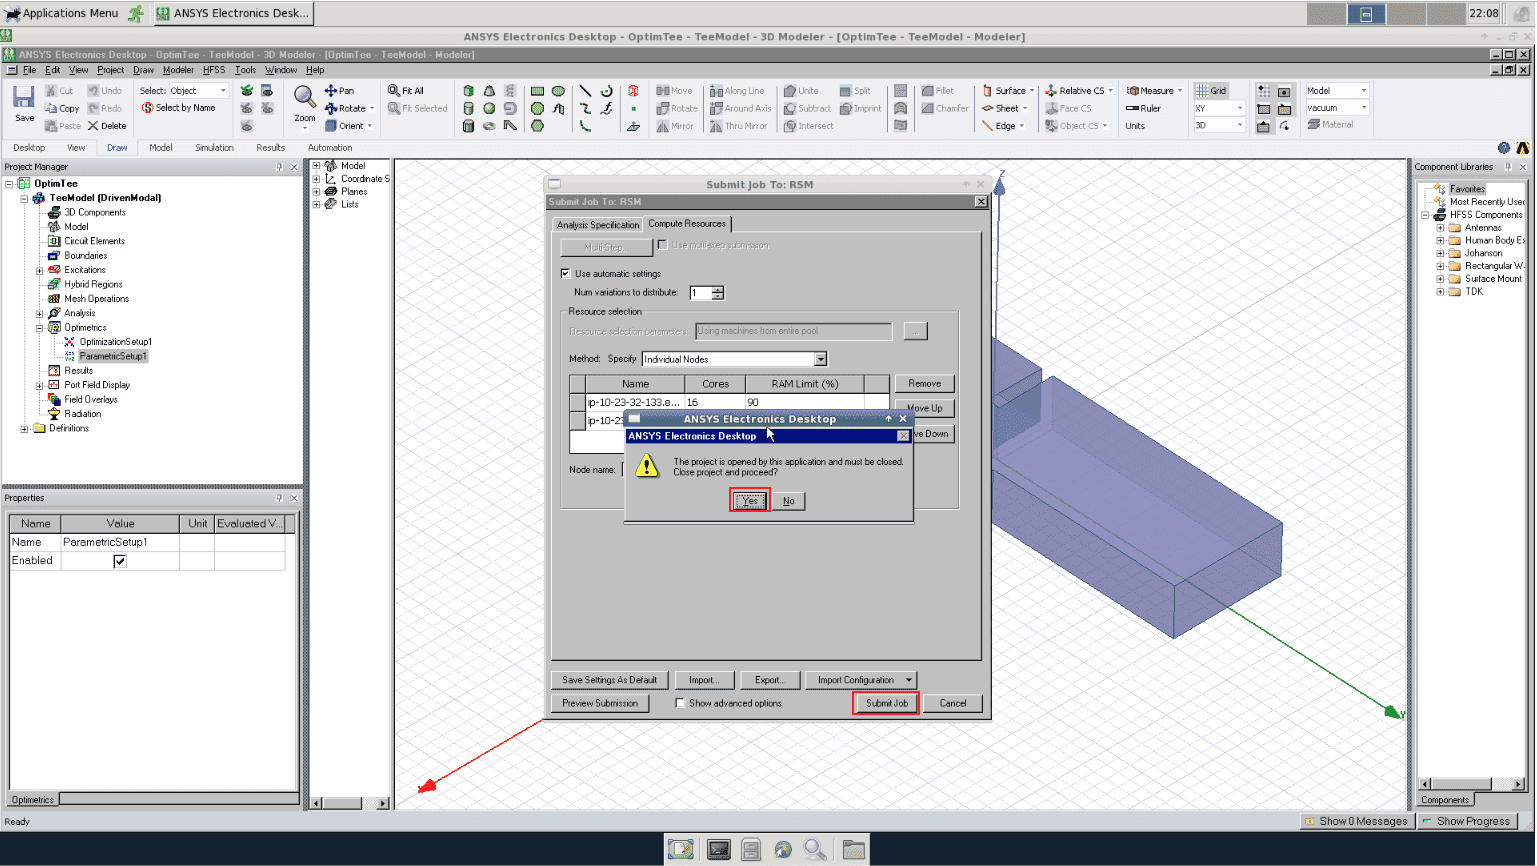
- Click on Submit Job
- On the dialog box that opens, click on Yes to close the project
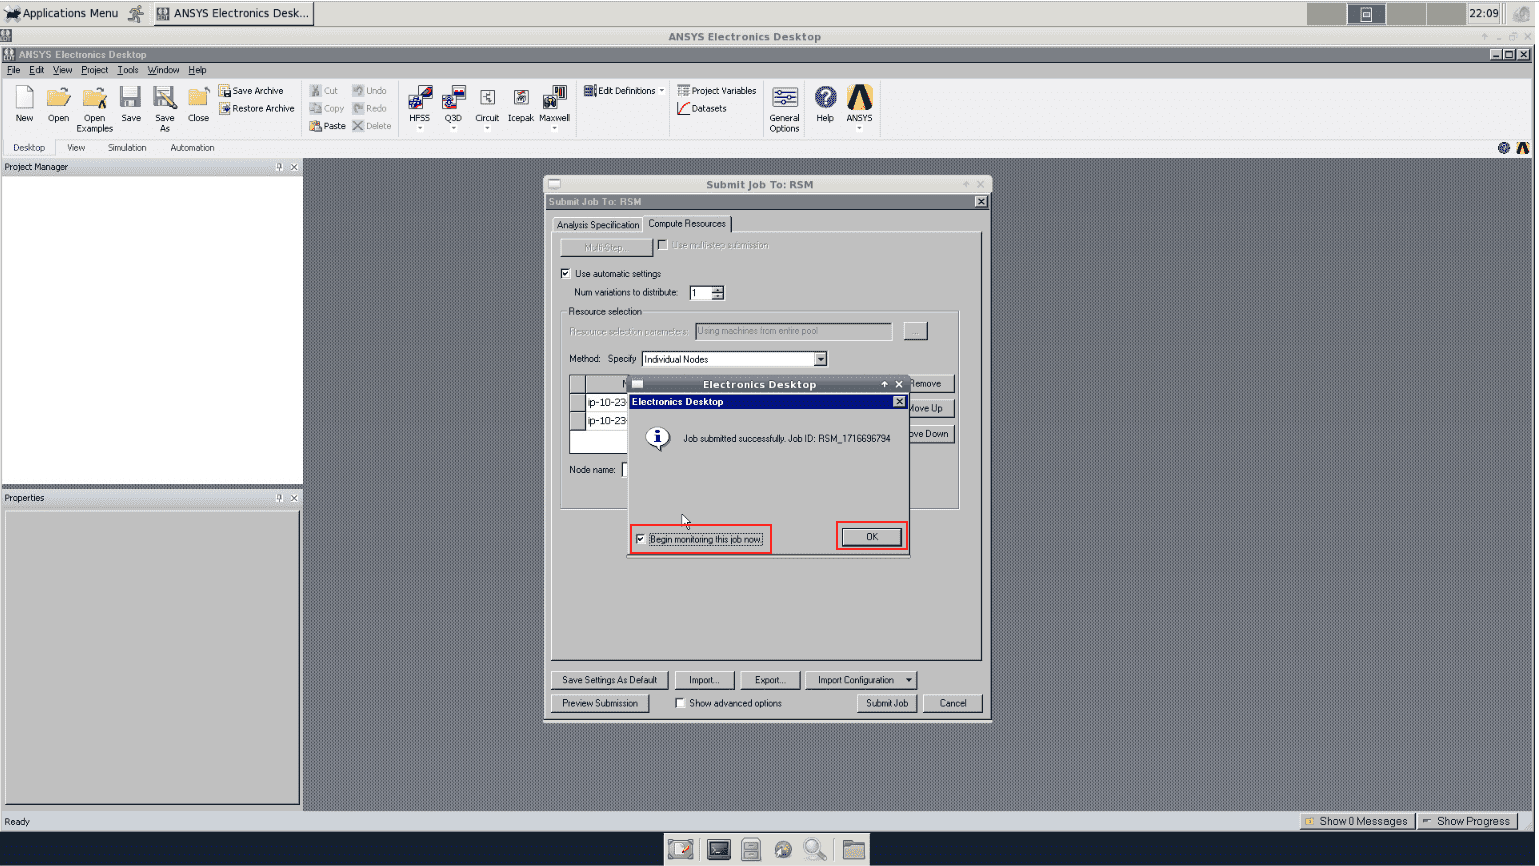
- A dialog box will be displayed with the message that the job has been submitted. Check the box next to Begin monitoring this job now and click on OK
- Next, the Monitor Job dialog box will be displayed. In the Messages window on the bottom left, you will see status messages regarding the jobs
- The Progress tab indicates the Analysis progress
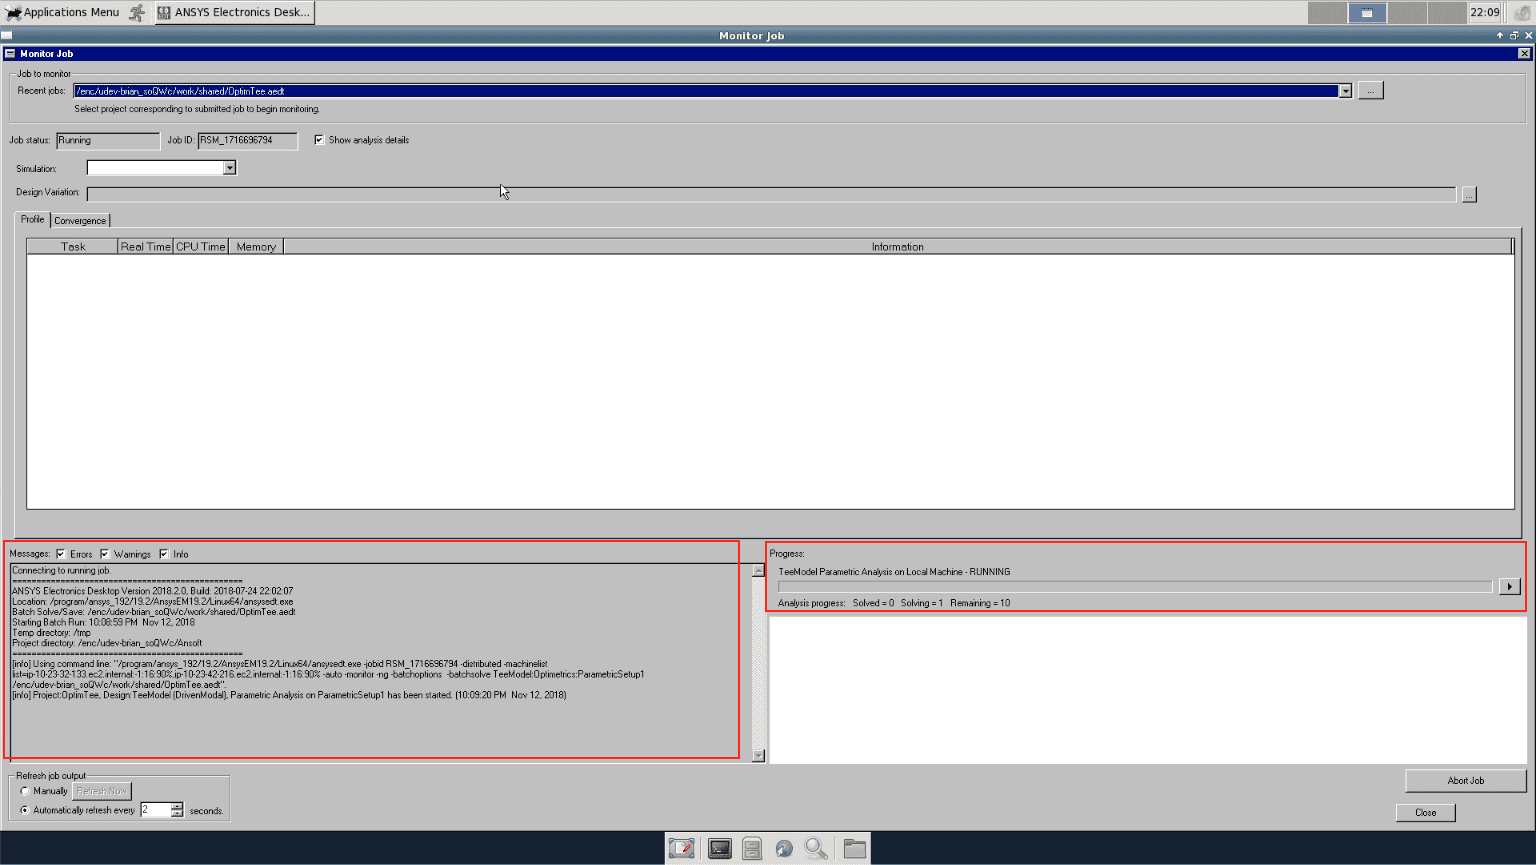
- The Progress tab indicates the Analysis progress
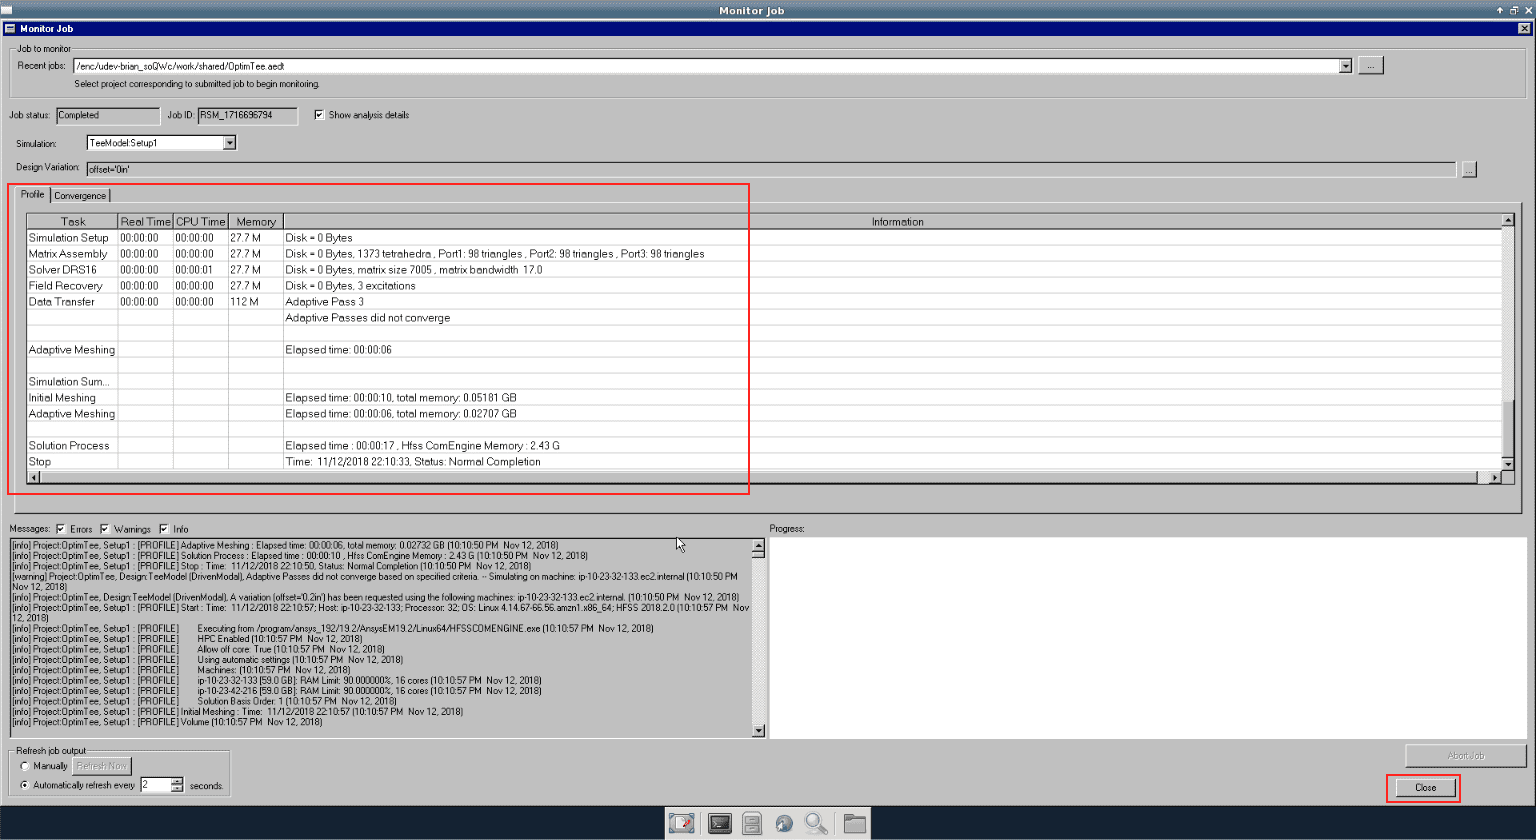
- The Profile tab on the tab should show additional information like regarding the analysis
- Once the job is completed solving, you can click on Close button on the Monitor Job dialog box
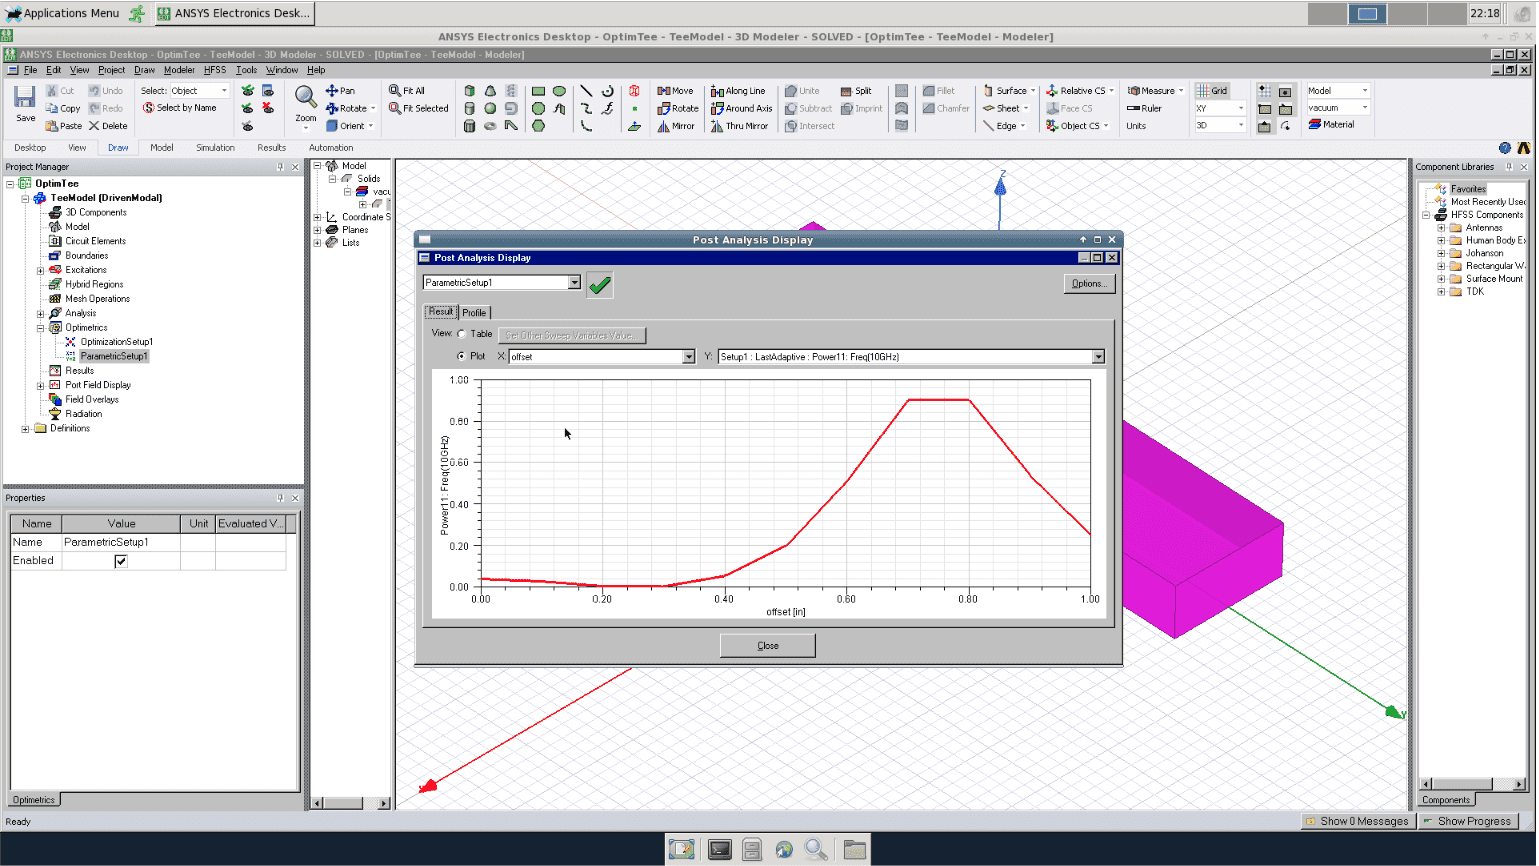
- To view the results, click on Open and browse to the shared directory. Click on the .aedt file and click on Open. Note that the input file can be .aedt or .aedtz
- On the Project Manager tree, right click on Parametric Setup and click on View/Analyze Results
- The files are automatically saved to the work folder
- Terminate the job to end the Desktop session. Any files saved to the work folder will be uploaded to the job files under Results on the platform