
Using Workstations to Interact with Simulations
Updated: October 20, 2022
Overview
This page walks you through how to use Rescale Workstations. In order to access the Workstations feature, log in to your Rescale account (Rescale Platform). If you don’t have a Rescale account, you can create an account at here: Rescale Signup.
Rescale Elastic Cloud Workstations (ECW) is a Desktop-as-a-Service (DaaS) solution that lets you access your applications and hardware from any location with the cloud, consolidating Rescale’s Classic and End-to-End Desktops functionalities, allowing for better collaboration and simplification of data management in order to streamline your workflows.
Workstations offer single-node compute and GPU hardware, as well as multi-node batch compute clusters with desktop visualizationVisualization is the representation of complex scientific or... More on the head nodeIn traditional computing, a node is an object on a network. ... More of your clusterA computing cluster consists of a set of loosely or tightly ... More, providing an interface for you to interact with jobs set up directly from the analysis software.
Some of the benefits of using workstations include:
- Interactive solving: Scale up your machine’s hardware in order to run simulations in a visual environment.
- Multi-cloudMulticloud refers to the practice of utilizing multiple clou... More workstations: Optimize your latency, performance, and cost using workstations, built with multi-cloud support. Workstations connect seamlessly with AWSAmazon Web Services (AWS) is a subsidiary of Amazon.com that... More, Azure, Google Cloud, and Oracle Cloud.
- Easy access from Rescale Jobs → Workstations: Access all of your Rescale filesRescale feature for data management with groupings of result... More directly from a workstationA workstation is a powerful computer system designed for pro... More so that you no longer have to drag and drop files.
- 1000+ Applications and On-Demand LicensingLicensing is a legal tool granting users the rights to use, ... More: License over 1000+ engineering software applications on the fly using the newest hardware, only paying when you use it versus paying upfront.
- Visualization with NiceDCV: View your workstation directly in your browser or through a local client with low latency. You can also run graphics-intensive applications remotely, eliminating the need for expensive dedicated computers.
Use cases
Some of the general use cases of workstations include:
- Computer-Aided Design (CADCAD stands for Computer-Aided Design. It is the use of compu... More)
- Pre-processing
- Interactive solving
- Post-processing
For these use cases, pre-processing accounts for around 20% of usage, post-processing for around 70%, and interactive solving for around 10%. Interactive solving is the smallest use case by session, but results in the largest number of corean individual processing unit within a multicore processor o... More hours being used and is primarily meant for users who want to interact with their simulationSimulation is experimentation, testing scenarios, and making... More versus using batch jobsBatch jobs are automated tasks submitted to a computing syst... More.
Supported operating systems
Windows 2019, Linux CentOS
Supported cloud service providers
Amazon Web Services (AWS), Microsoft Azure, Oracle Cloud Infrastructure (OCI)
In-browser latency
The expectation is <100ms. In order to reduce latency further, please use the NiceDCV local client and reach out to your Rescale representative to get a region preference nearby your physical location. When doing so, latency is expected to be <50ms.
Start-up time
We expect Workstations to launch in under 25 minutes for most configurations. There are certain software and hardware combinations that may result in the launch from the initial setup taking longer. Whenever a Workstation is launched from suspend, it will take under 3 minutes. Please refer to Suspending your Workstation for more information.
| Launch from Suspend | 3 minutes |
| Linux – Launch from Initial Setup | 15 minutes |
| Windows – Launch from Initial Setup | 25 minutes |
Workstations Home page
From the Workstations Home page, you can view, manage, and configure new and existing workstations.
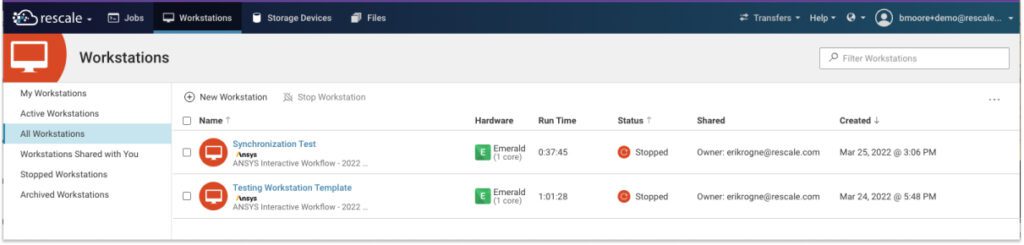
Available workstation filters include:
- Active Workstations
- My Workstations
- All Workstations
- Workstations Shared with You
- Stopped Workstations
- Archived Workstations
- Classic Desktops
When you select a workstations tab, all of its associated workstations appear in list form, displaying the following information for each workstation:
| Column Name | Description |
| ID | The ID of the resource that you can share with support |
| Name | Shows name manually entered for the resource, the status, and the name of the selected software. |
| Status Action | Primary actions are available based on the current status of the resource. |
| Description | The description manually entered in for the resource |
| Hardware | Shows the coretypePre-configured and optimized architectures for different HPC... More selected, including the total number of cores. |
| Project | Displays the project name (e.g. E-TST-GENERAL-01) |
| Priority | The priority of the resource: On Demand Priority (ODP), On Demand Economy (ODE), On Demand Reserved (ODR) |
| Run Time | The elapsed run time, including the ability to modify the walltime. |
| Status | Shows the status of the workstation. Statuses include Starting, Active, Stopping, and Stopped. |
| Tags | Tags associated with the resource, can add additional tags by clicking the (+) button |
| Shared | If you shared the resource, the icon will be grey. If someone shared the resource with you, they will be blue. Click the icon or (+) to share. Hover over any icon to see the name and email address of the person. |
| Created | Shows the date and time the workstation was created. |
| Storage | The amount of storage of input and output files |
| Lineage | This shows where the job originated from: (duplicated, templated, new) and where it came from. |
| Comments | Displays the most recent comment. Click the (+) button to add a new comment. |
| Actions | Action buttons: suspend, save as template, duplicae, share, archive, stop |
- Actions: Hover over the right end of the workstation’s line to view action buttons. Available actions include:
- Save as Template: Save the workstation’s configuration to use as a template for future workstations.
- Duplicate: Create a new duplicate workstation from the selected workstation.
- Share: Share the selected workstation with people in your workspaceWorkspaces allow rescale customers to create dedicated teams... More.
- Archive Workstation: Move the selected workstation to the Archived Workstations tab. By default, the workstation’s output files are moved to the trash when it is archived. You will also have the option to move input files to the trash upon archival. Note that storage costs will continue to be accrued until the files are deleted from the trash.
- Stop Workstation: Stop a workstation session that is in progress.
Status Action
You will find a Status Action on both the Workstation and Job pages, providing you with a primary action button.
Workstations
- Continue: Continue where you left off from a draft
- Connect: Connect to NiceDCV in-browser (default) or using the application (dropdown)
- Resume: Resume from suspension
- Starting Loading Bar
- Stopping Loading Bar
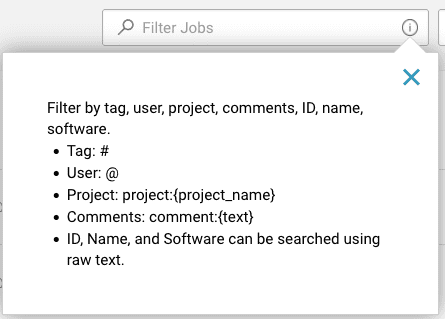
Managing columns and filters
In the search bar, you can filter by tag, user, project, comments, ID, name, and software.
| Search Parameter | Method |
| Tag | #<tag> – this will search for jobs with tags containing the text found after the # |
| User | @email – will search for jobs that are owned by the user with the provided email (e.g. @user@example.com) |
| Project | project:<project-name> – will search for jobs that are in the project that is being searched for. Also supports multiword projects by surrounding the name in quotes (e.g. project:”project with spaces in its name”) |
| Comments | comment:”<partial comment>” – will search for jobs that contain a comment which includes the provided text. Also supports single word comment search without quotes (e.g. comment:nice). |
| ID | Search by ID using raw text. |
| Name | Search by name using raw text. |
| Software | Search by software using raw text. |
Managing columns and filters
On the Workstations Home page, select the (…) icon to customize your filters and filter column headers.
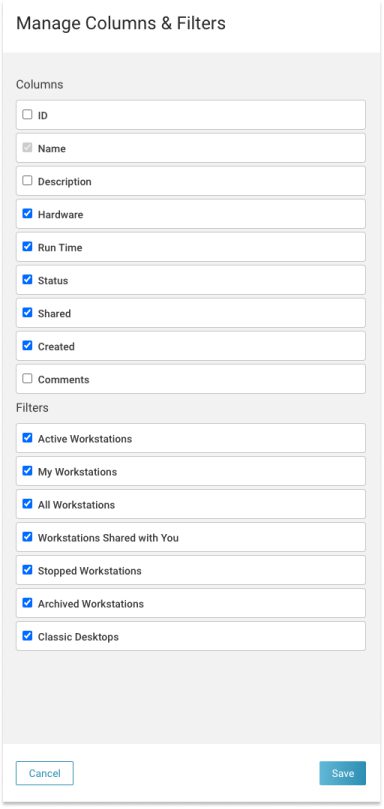
Note: The Name column field is selected by default and cannot be removed.
Setting up workstations
You can set up a new workstation manually or by using a template.
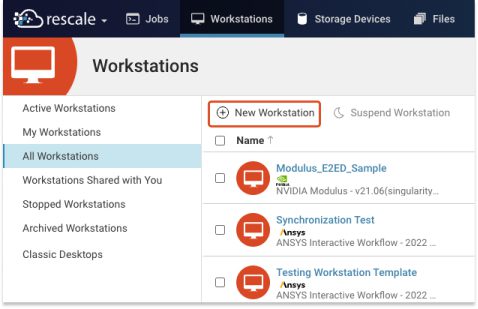
Creating a new workstation
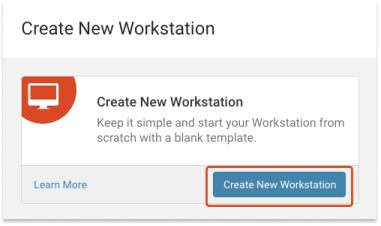
To create a new workstation, select New Workstation from the top left of the Workstations Home page.
Select Create New Workstation from the top of the drawer to create a new workstation.
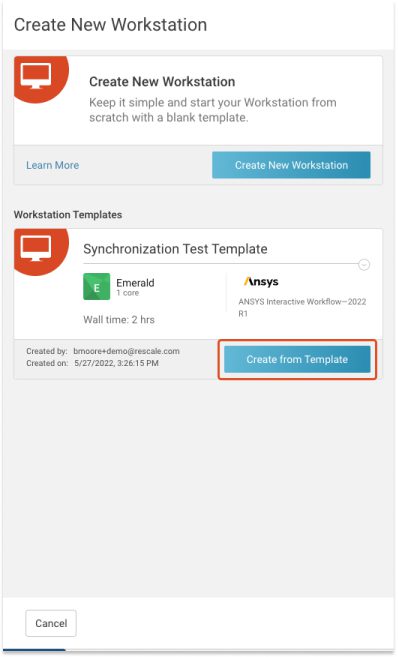
Creating a new workstation using templates
You can also create a workstation from workstation templates, displayed below the Create a new Workstation section, by selecting Create from Template on the selected template. You can also search existing templates. Each template displays the template’s name, software, and hardware.
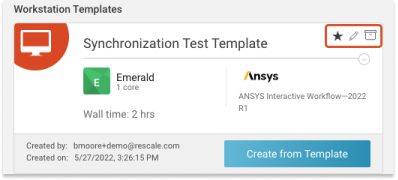
Hover over the top right corner to see the Action icons, which allow you to pin a template to the top of the template list, edit the template, or archive the template.
To save an existing workstation as a template, clone the workstation by selecting the Duplicate button. When the duplicated workstation appears, enter a template name in the title and then select Save as template from the Save button.
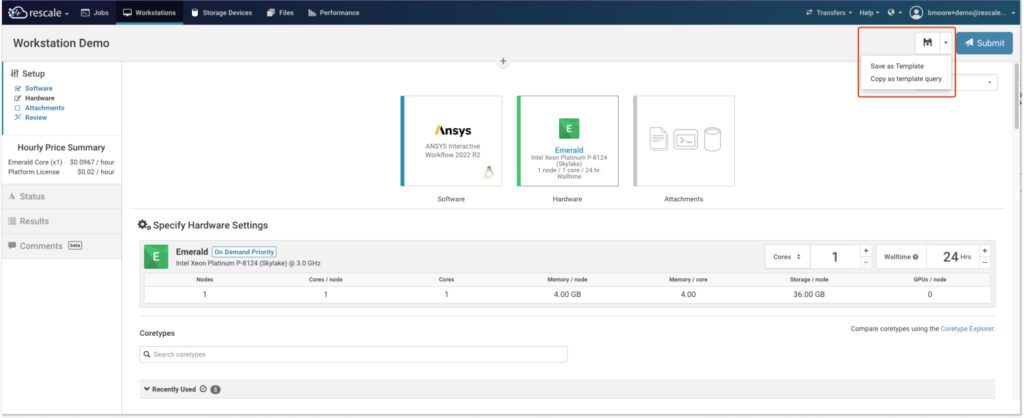
The saved template will then appear in your template list.
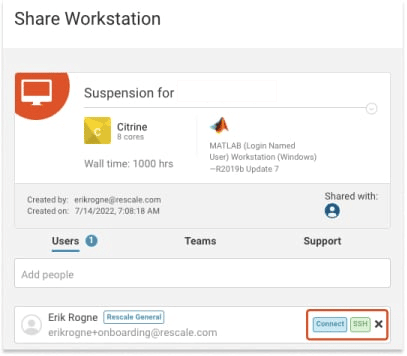
Sharing a workstation
You can share a workstation with a user, team, or Support by selecting the Share icon on the Workstations Home page next to any of your workstations.

There are three permissions that can be enabled for sharing workstations:
- Include both input files and results when sharing: allows shared users to view files and results
- Allow in-browser SSH access: allows shared users to SSH into a Workstation, but not connect via NiceDCV
- Allow recipients to connect to workstation: allows shared users to Connect, Suspend, and Resume (from suspension) a workstation
If the second and/or third permissions are enabled for a user, team, or Support, you will be able to see Connect and/or SSH tags in their user information in the Share Workstation panel.
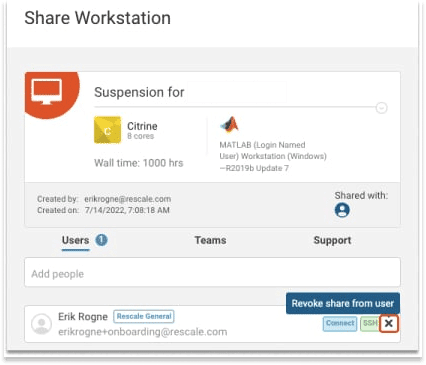
Note: At this time, users are not able to share workstations with internal Rescale employees, except for Support.
If a user, team, or Support was incorrectly given a permission, you can revoke all of their permissions by clicking the X in their user information next to the tags and then reassign the appropriate permissions.
Configuring workstations
To configure a workstation, you need to select the software and hardware you want to use, as well as upload input files, if needed.
Selecting software
From the Software Settings page, you can select and configure your workstation’s software.
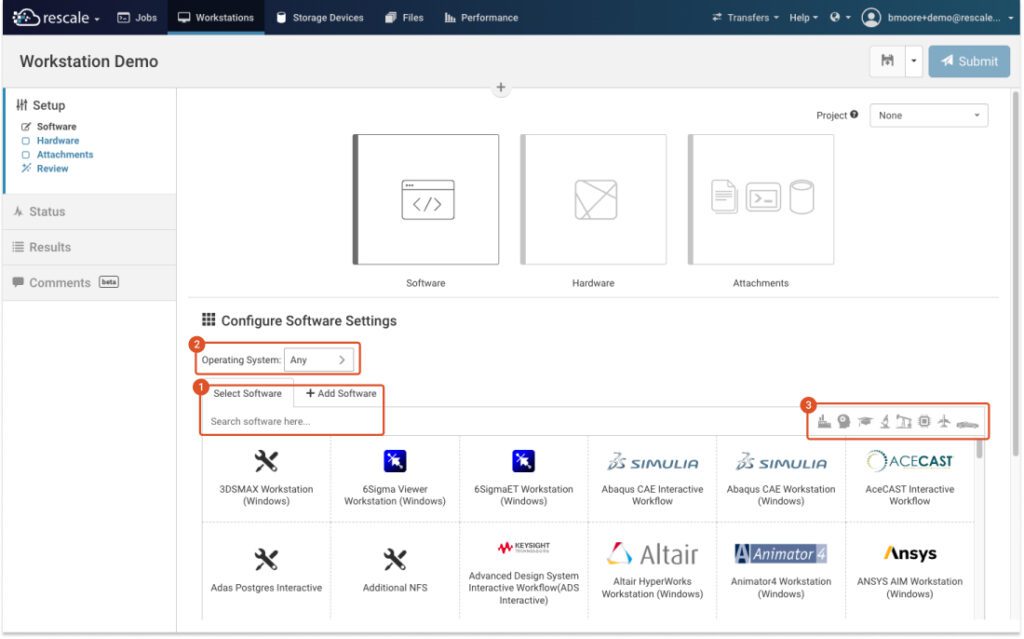
On the Select Software tab, choose from the list of available software, displayed in alphabetical order. You can also search for specific software (1) or filter by operating system (2) or industry (3) at the top of the list.
When you select the software for your workstation, you will need to select the operating system and software version needed and enter the licensing information.
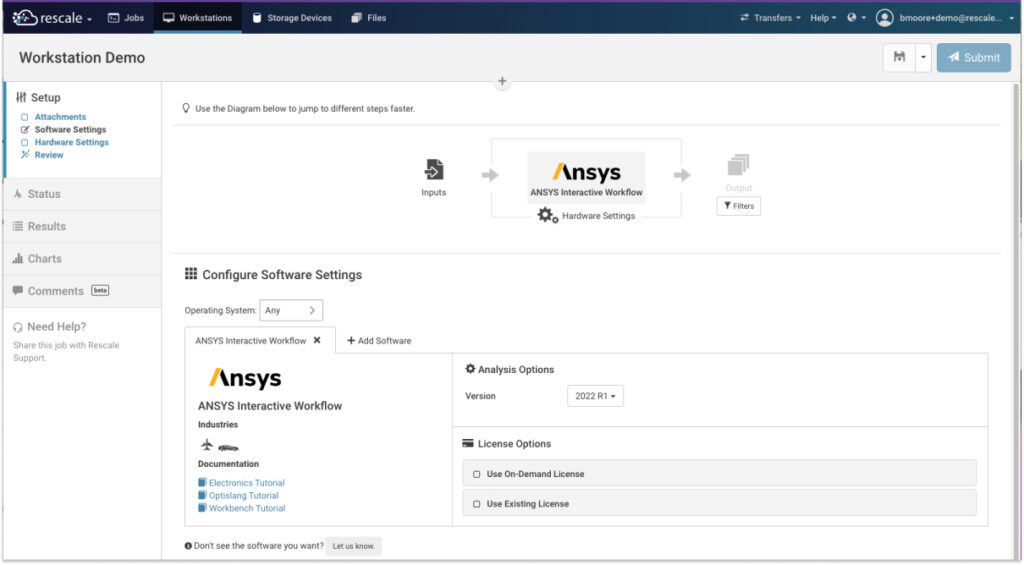
You can use either an on-demand license provided by Rescale or use an existing license provided by your organization.
Once you have finished setting up your software, select Next to continue to Hardware Settings.
Selecting hardware
When you select your workstation’s software, the Hardware Settings page will automatically update to offer hardware compatible with the work you want to complete, based on their performance on your selected software, operating system, and regional preferences.
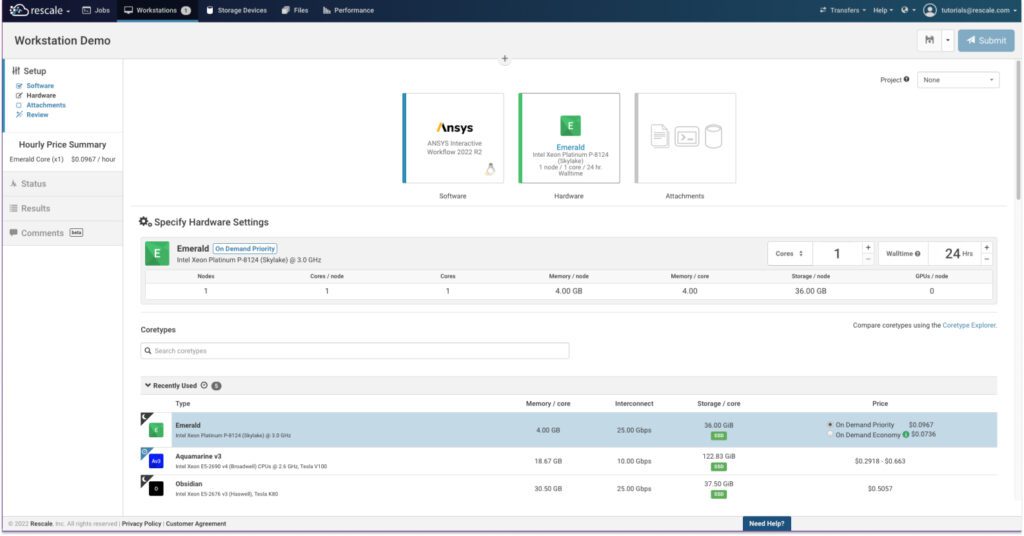
Once you have selected and configured your workstation’s hardware, select Next to continue to the Attachments page.
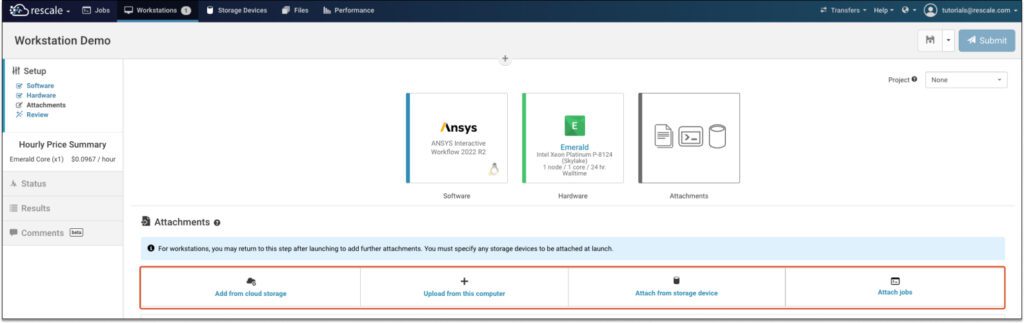
Uploading attachments
On the Attachments page, you can specify your input files through one of four options:
- Add from cloud storagea simple and scalable way to store, access, and share data o... More: Choose from files already uploaded to the Rescale platform.
- Upload from this computer: Choose a file from your computer’s file explorer.
- Attach from storage device: Choose a file from a local storage device, if available.
- Attach jobs: Choose a job from a list of your existing jobs.
Additionally, you can also attach files or jobs after launching your workstation from both your computer and Rescale files, although you must specify any storage devices to be attached at the workstation’s launch.
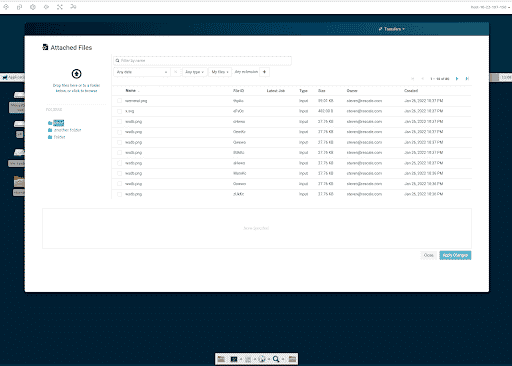
Once you upload one or more input files, you will see each file’s information displayed in list format, including the file’s name, ID, and size. Additionally, you can compress/decompress, download, or remove files from the Actions column.

When you have added all necessary files, select Next to continue to the Review page.
Reviewing selections
On the Review page, you can review your workstation’s input files, software settings, and hardware settings before submitting the workstation for creation.
You can also select output filters that allow you to archive specified selectors separately into a single zip file.

Write your filter in the Selector box and select Add to apply the selector. The applied filter will be shown in the Selector(s) list. You can add as many file filters as you need. For multiple filters, it will take all matches and place them into a single archive. If you need to remove the selector, click the X key under the Action column. For more information, see Managing Your Job Results.
Once you have reviewed your workstation’s input files, software settings, and hardware settings, select Submit to run and create the workstation. Additionally, you can select the Save icon to save your workstation’s settings as a template for future use.

Within 15 minutes, your workstation will be configured to your specifications and you can connect and visually interact with your simulations, just as you would do on your normal computer.
Connecting to your workstation
Once the servera server is a computer program that provides services to oth... More has started, you can connect to your workstation either in-browser or via a client on your local machine.
Connecting in-browser
Connecting in-browser is frequently the lowest-effort connection, but it provides a lower-resolution workstation session. To connect in-browser, click the Connect button once it appears, as shown below. It should appear once the OS is installed and updated and the Rescale runtime is configured.

After you click the Connect button, you can use the remote desktop right in your browser.
Connecting with a client
Connecting with a client on your own computer can offer much better graphics than an in-browser connection, but it requires more setup.
DCV: Port 8443
If your company does not allow traffic through one of these ports, that method of desktop visualization will not work.
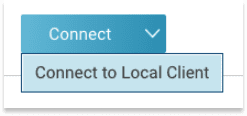
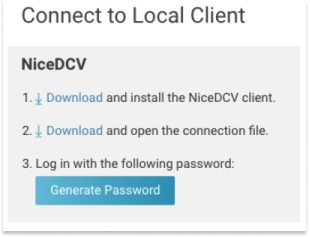
To connect to your Windows or Linux desktop via NICE DCV on your computer:
- Click the dropdown next to the Connect button and select Connect to Local Client for the connection method you plan to use. You can also expand the instructions.
- Download the NICE DCV client here.
- Click Download File for your chosen client.
- Click Generate Password.
- Double-click the file to open the Workstation. You will be prompted to enter the password generated in Step 3. Note that the password is case sensitive. The same password is used on the sign-in page.
Using your workstation
Syncing Workstation Files to Rescale Files
When syncing files from a Workstation to the Rescale Cloud, there are a few important things to keep in mind:
- All files must be added to the ~/work directory to sync them back to the Rescale Cloud.
- If files are not added to the work directory, they will be lost once the Workstation is stopped.
- To initiate syncing to the Rescale Cloud while Workstation is running, users should utilize the Sync button available on the Workstation page.
- Clicking on the Sync Files button will let you sync newly added files inside the ~/work directory to the Result’s Page(also Rescale Cloud).


By following these steps, users can easily keep their files up-to-date between the Workstation and the Rescale Cloud.
FAQ
How long can I run a Workstation?
There is no limit to how long a workstation can run. Workstations with an age of more than 30 days (accumulated active and suspended states) may fail their health check and will be terminated. In the majority of cases, we will be able to recover the files associated with the workstation. Users may choose to continue running workstations beyond 30 days at their own risk.
How can I reduce my latency?
In order to reduce latency, use the NiceDCV local client and have your Rescale representative set a region preference nearby your physical location. When doing so, your latency should be <50ms.